Hosting a Serverless Web Application in AWS - Part II
Enable CloudFront distribution for static website
I am a seasoned IT professional with deep experience in delivering business solutions in a variety of industries. Over the years I have successfully handled all aspects of project lifecycle - planning, product selection, analysis, architecture, design, development, implementation and support.
This is the second article in this series about hosting a serverless web application in AWS.
In the previous article, we set up a static website using AWS S3. However, there are some problems with this - we had to enable public access on our bucket and the website does not use SSL/TLS. In this article, we will enable CloudFront distribution for this website and avoid these problems.
Amazon CloudFront
Amazon CloudFront is a Content Delivery Network (CDN) that distributes our content globally to various edge locations. When a user requests our content, they are served from the edge location nearest to them, reducing latency. CloudFront caches our files at edge locations. This means that repeated requests for the same content are served from the cache, which is much faster. Also, serving content from the cache reduces the number of requests to our S3 bucket, which can reduce our S3 costs.
Create a CloudFront Distribution
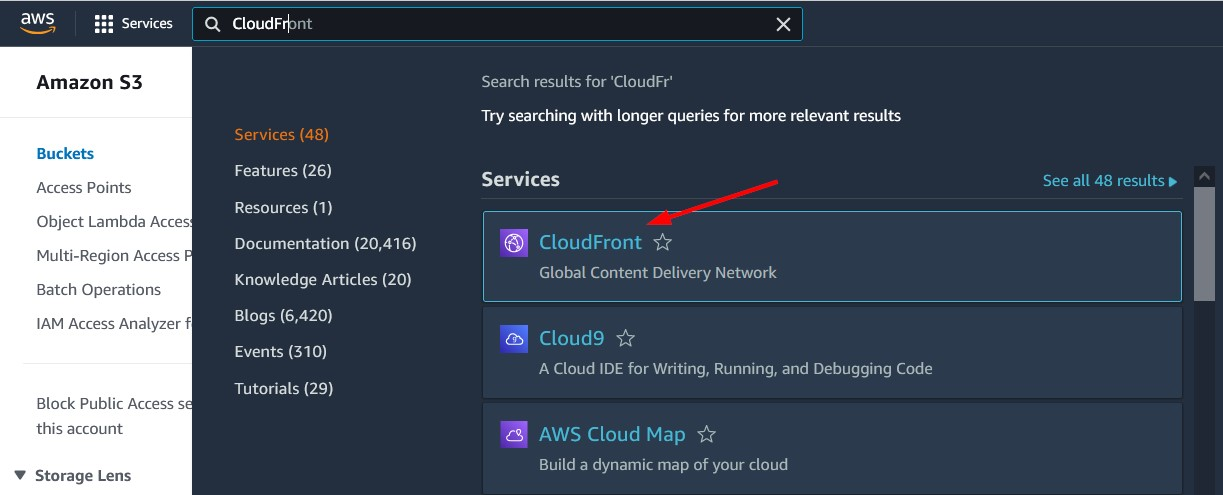
Navigate to the CloudFront page from the AWS console.
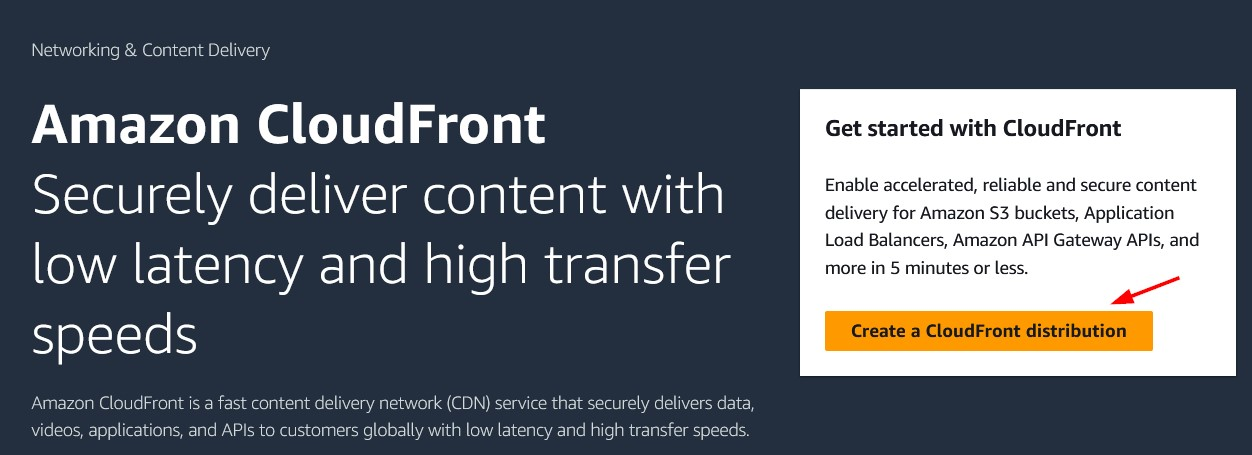
Click Create a CloudFront distribution .
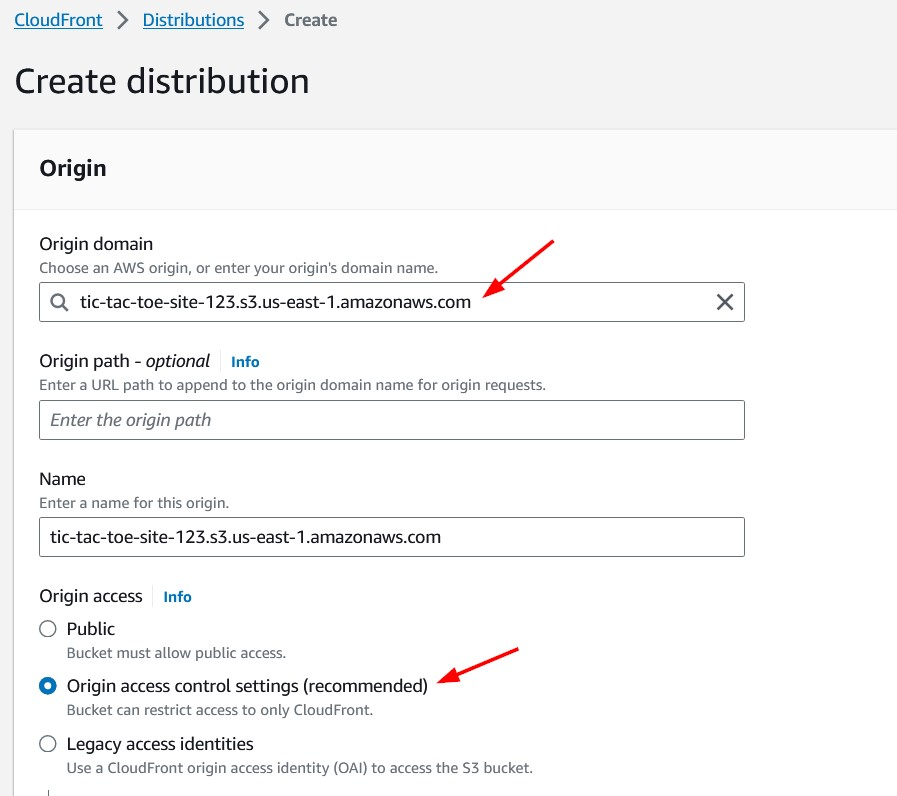
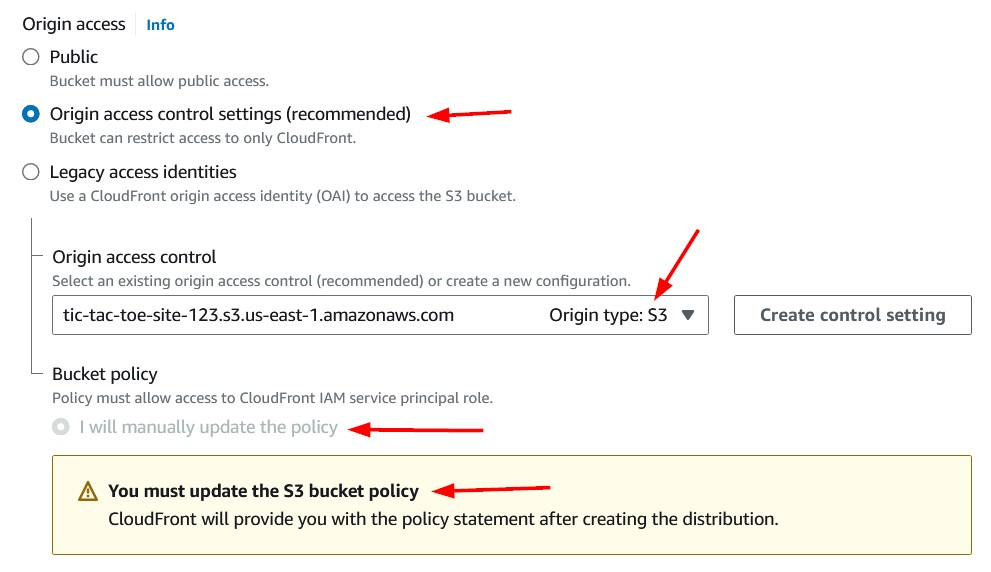
We will choose our S3 bucket in the Origin domain dropdown list. For Origin access, lets' select the Origin access control settings option as we do not want our bucket to be publicly accessible.
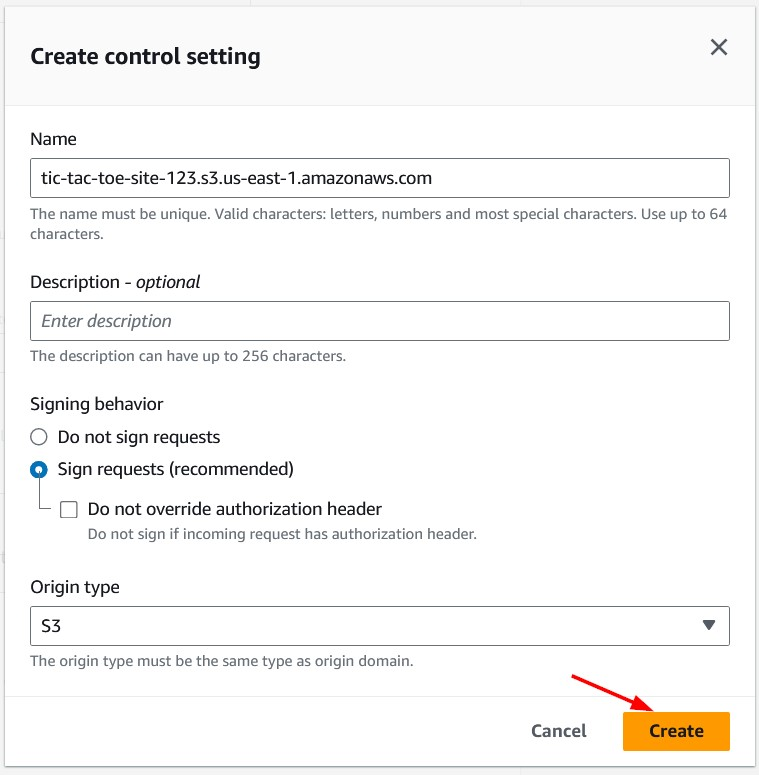
Next, we will create a new control settings.

We'll keep the default values in the Create control setting windows that pop-ups. Click the Create button to create the control setting.
Note that we will need to manually update the bucket policy to grant permissions to our CloudFront distribution.
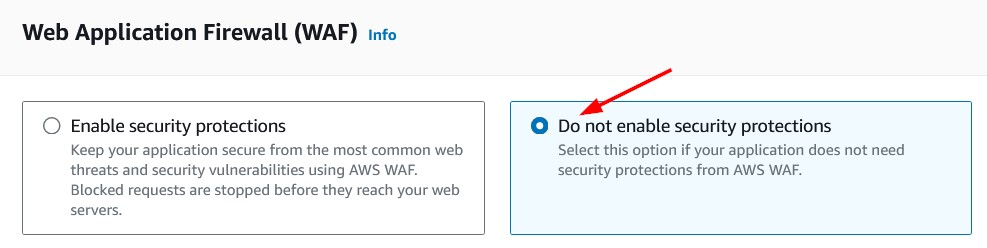
As this is just a sample application, choose Do not enable security protections in the Web Application Firewall section. For production applications, we should consider enabling security protections.
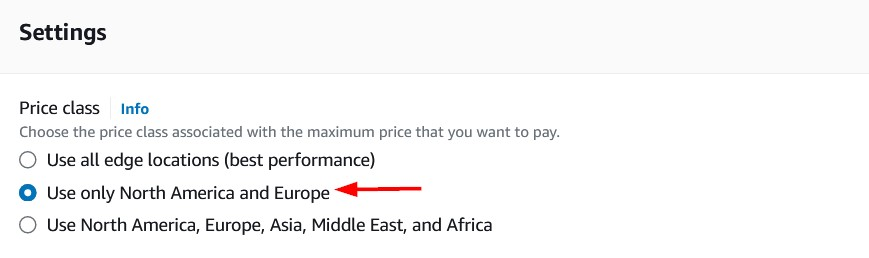
Let's assume that a majority of our users will be from North America and Europe and choose the appropriate Price class. This means that our website content will only be served by edge locations in these regions. This also means that users in other regions may see higher latency.
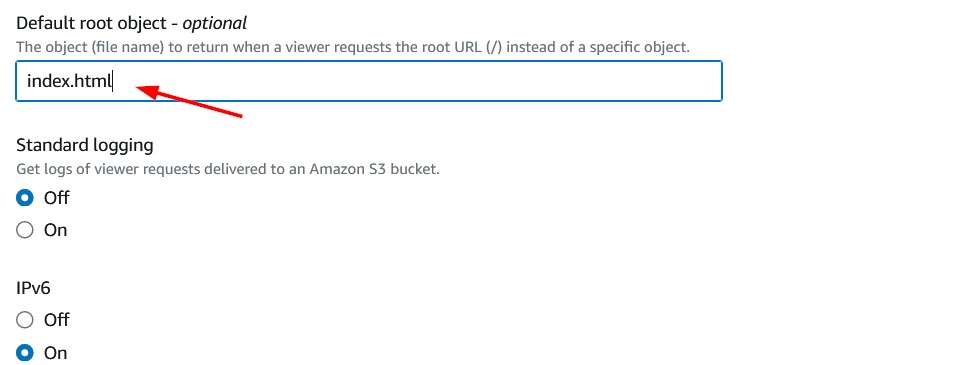
Since index.html is the home page of our website, we will set that as the Default root object. This is the content that will be returned when the user requests the root URL.
We will keep the remaining options as default and click Create distribution button at the bottom to create our distribution. We should see a confirmation that the new distribution was created successfully.
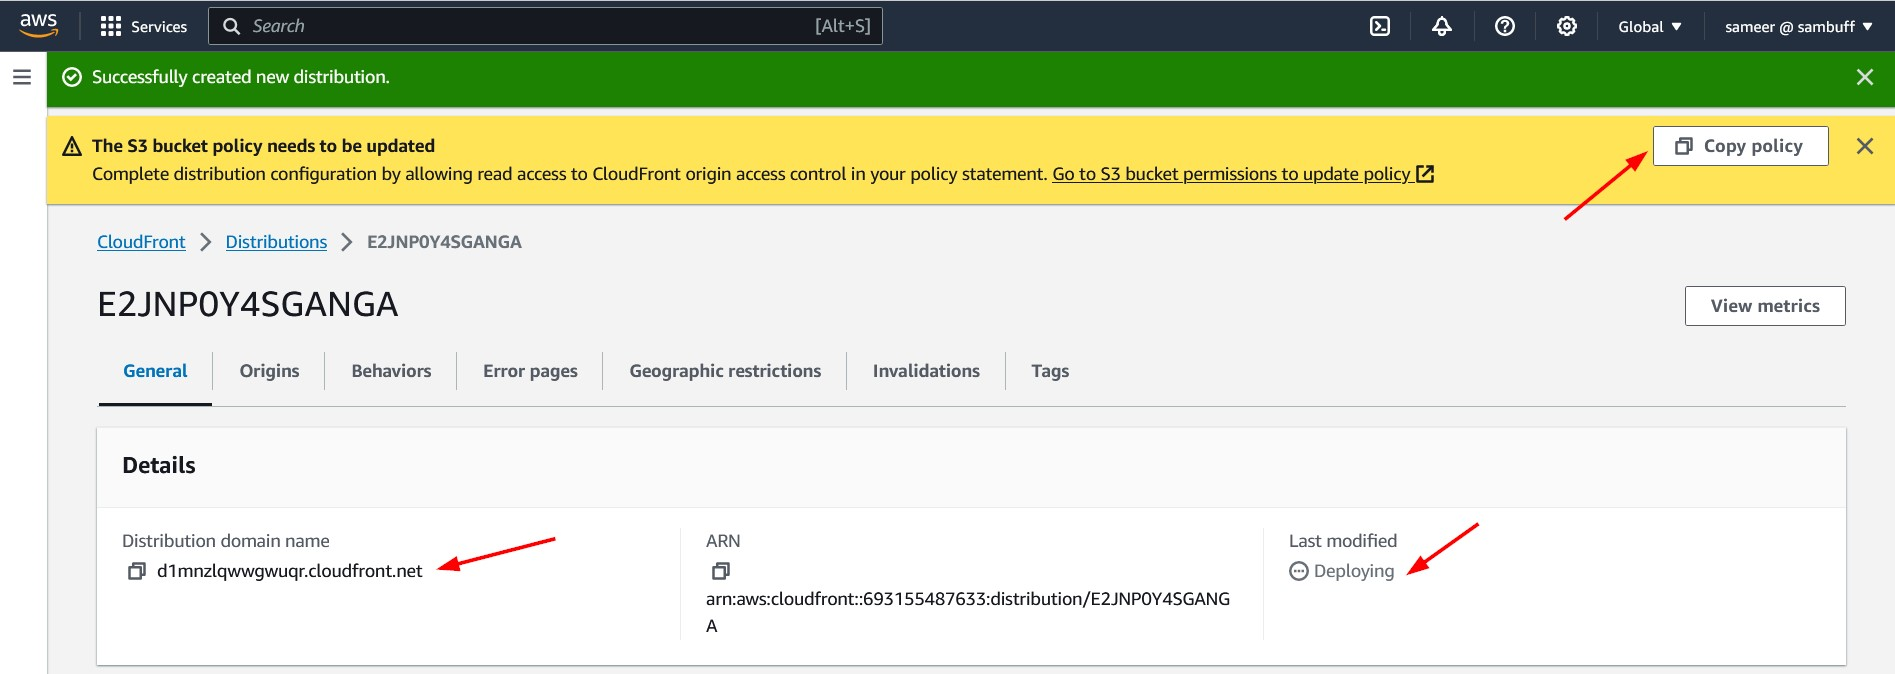
Make a note of the Distribution domain name as we will use it to access our website. There should be a Copy policy button on the top left corner. Click the copy icon to copy the S3 bucket policy. Now, let's navigate to the S3 bucket and update the bucket policy.
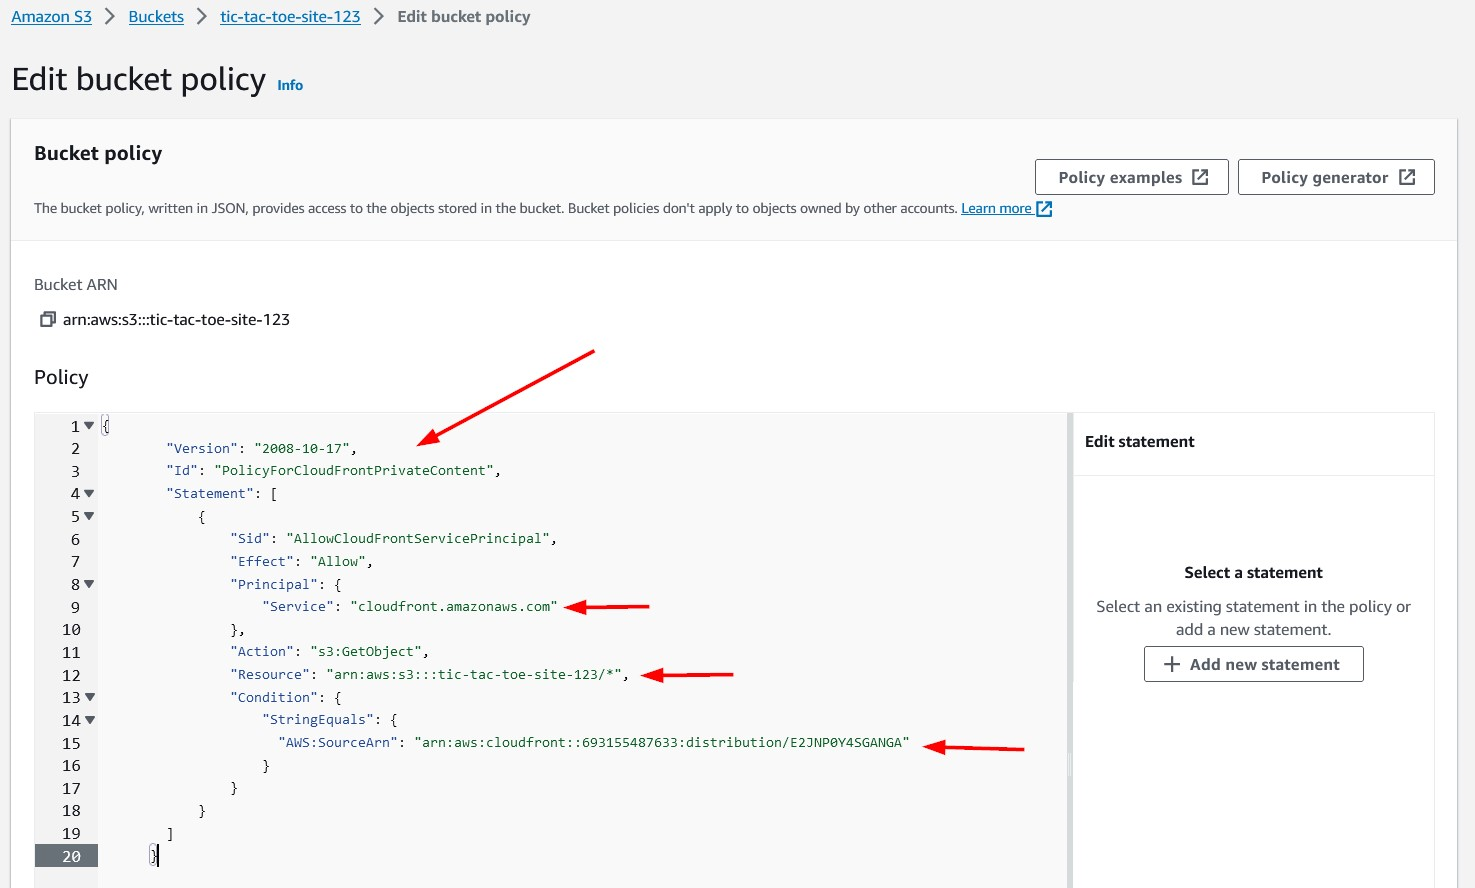
Replace the policy we created earlier with the policy that was copied above. Since we have created a CloudFront distribution to serve our website, we no longer require our bucket to be publicly accessible.
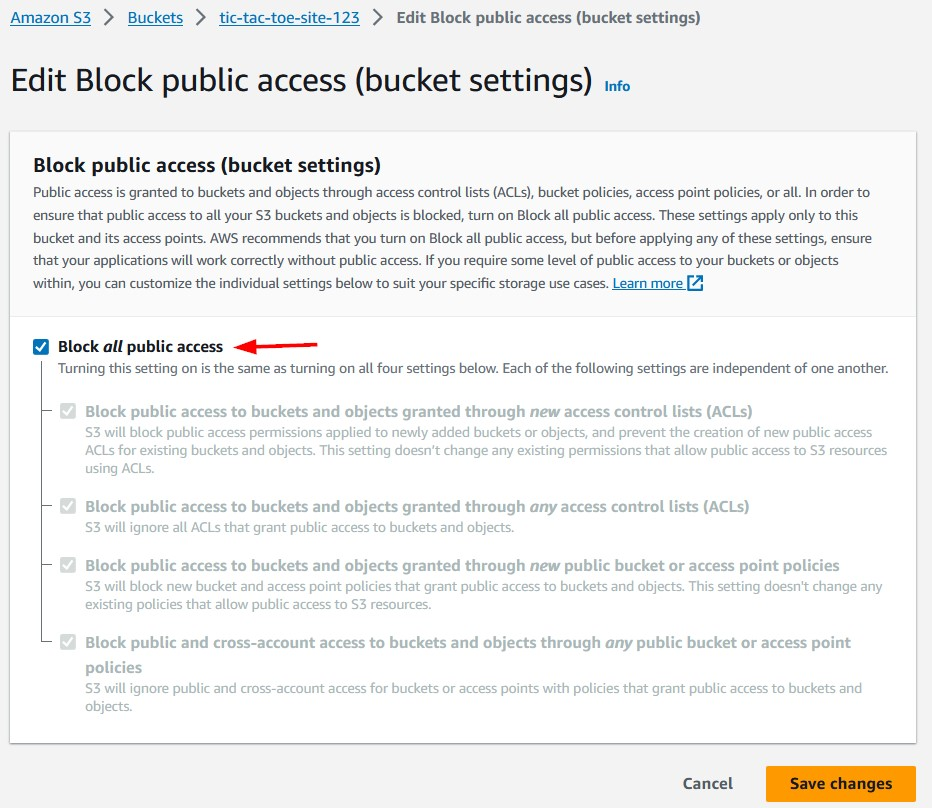
We will navigate back to Edit Block public access for our bucket and check Block all public access box and save changes. Checking this box will result in a confirmation pop-up.
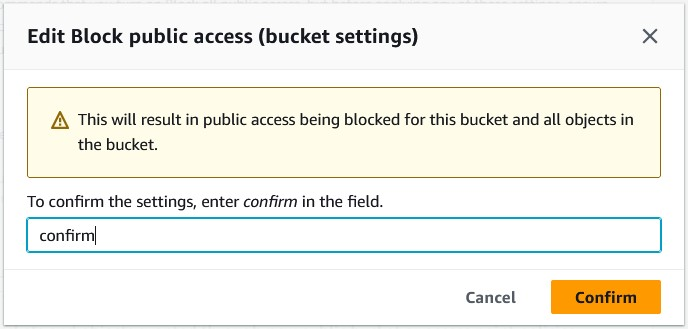
Type confirm in the field to confirm the settings and click Confirm.
Accessing our website
Our website will now be accessible using the Distribution domain name.
This is great but there is still one issue. The link for our website is cryptic and not ideal. So, now let us associate our domain with this CloudFront distribution so we can use a friendlier URL for our website.
Use our domain for our website
Note: If you don't have a domain, you can register one for a reasonably economical price or even free (with some restrictions). You can do a web search for this.
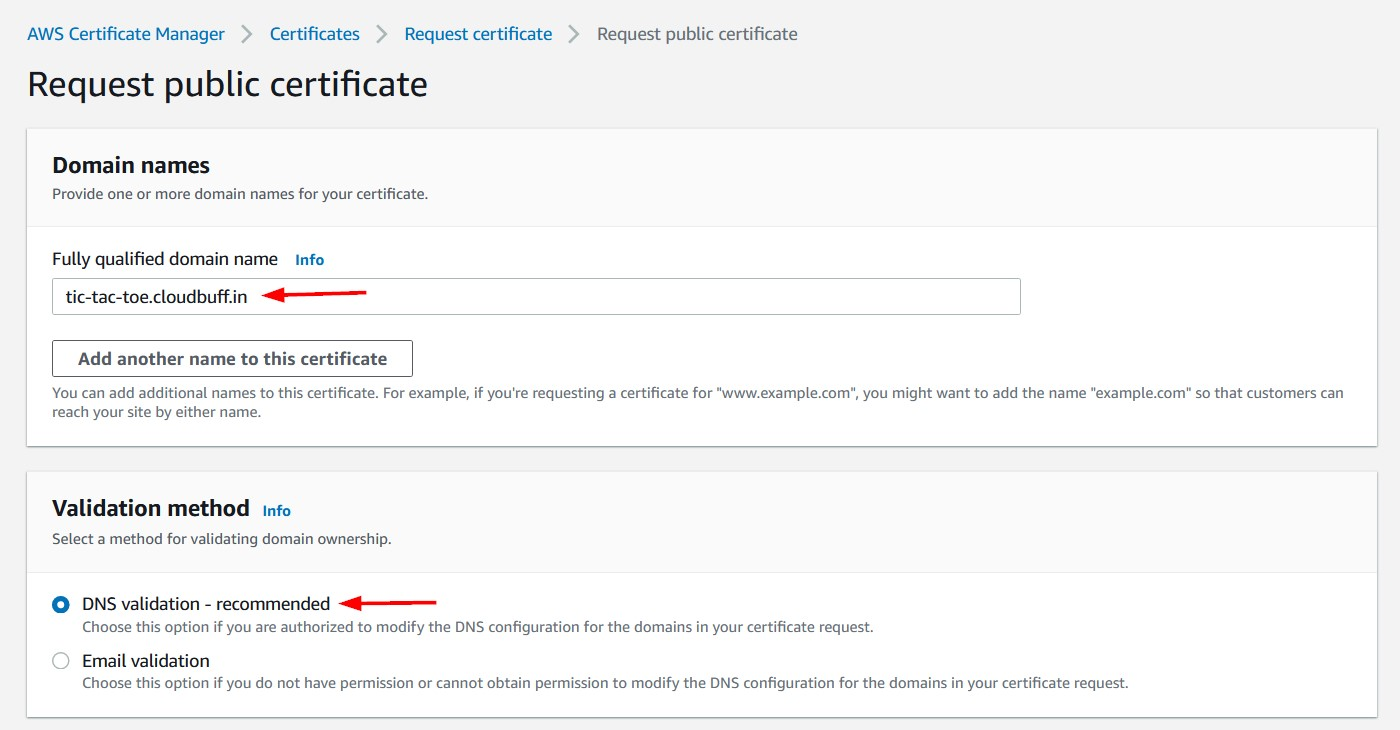
We already have a domain, cloudbuff.in , registered, so we will use tic-tac-toe.cloudbuff.in for our website.
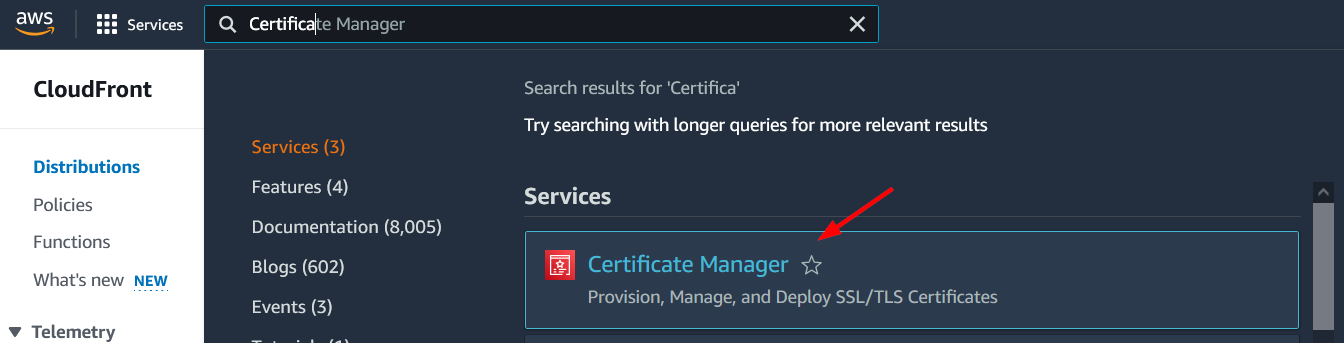
Request a certificate
Since we want our website to be secure and support SSL/TLS, we will request a new certificate for this domain from AWS Certificate Manager.
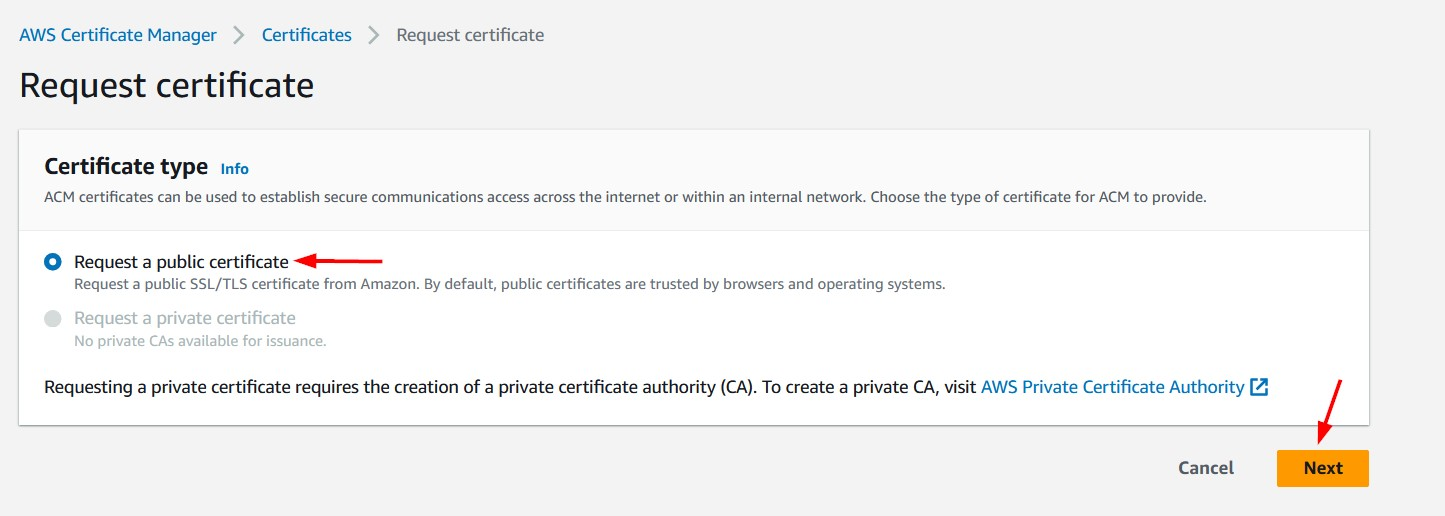
On AWS Certificate Manager screen, click the Request button to request this new certificate.

We will request a public certificate.
We will put in the desired domain for our website as the Fully qualified domain name and choose DNS validation as the method to validate domain ownership. Click the Request button at the bottom of the page to continue.
We should see a message that the certificate has been successfully requested. the status is Pending validation. We need to take some additional steps before the certificate is approved.
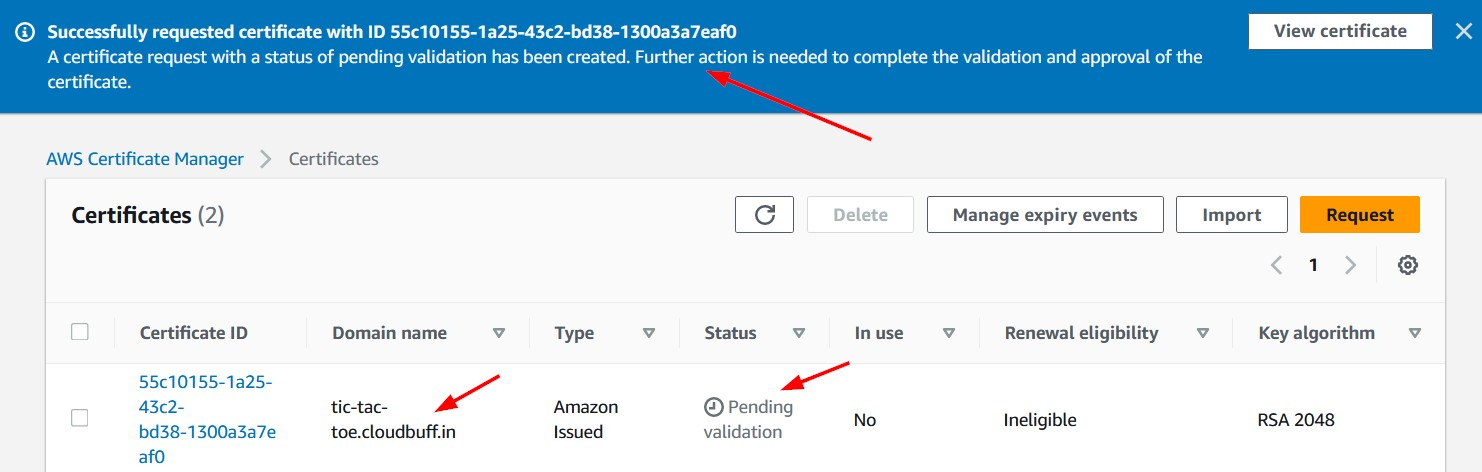
Click on the Certificate ID link and navigate to the Domains section.
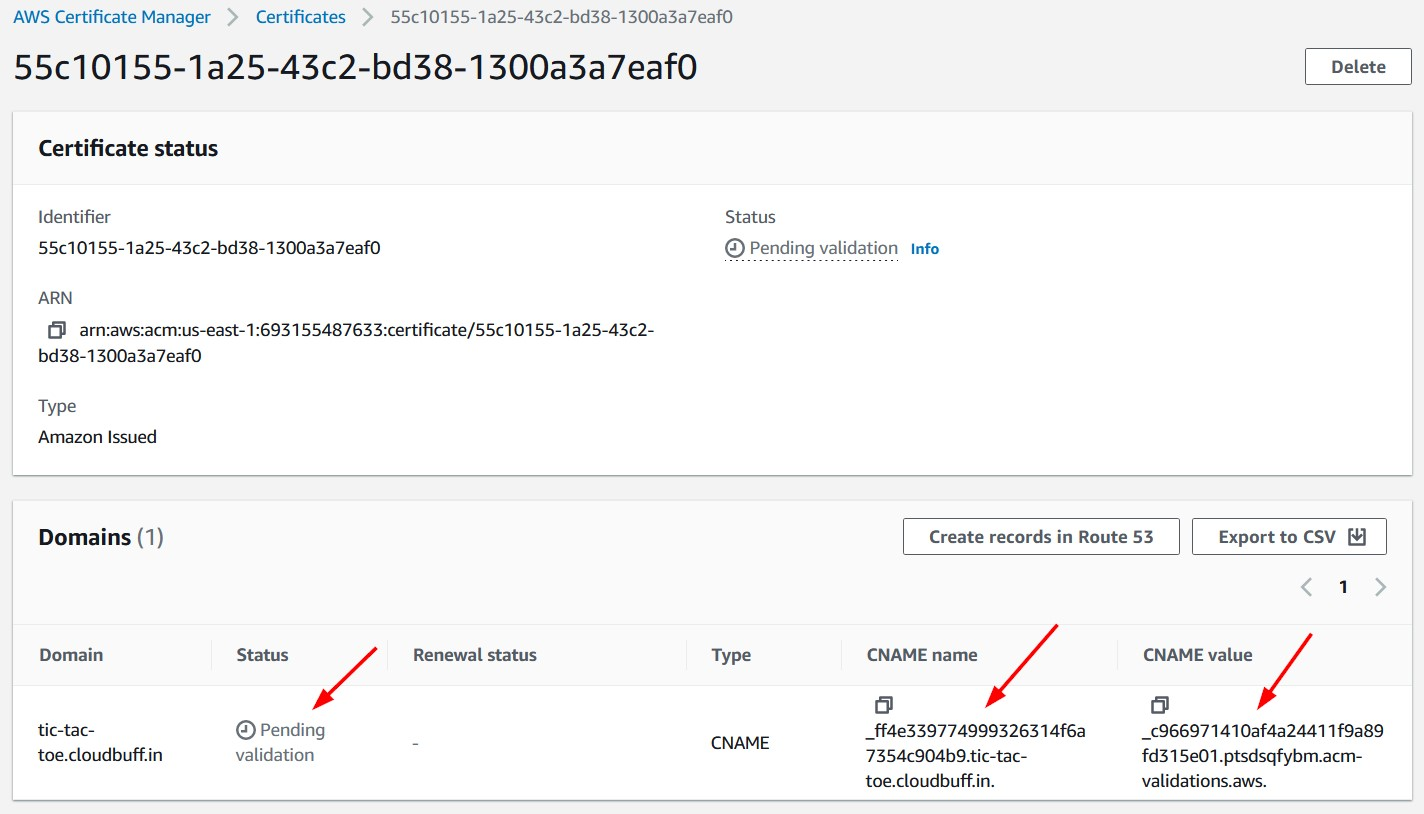
The status is Pending validation and there are two columns of interest CNAME name and CNAME value. We need to add a DNS record of type CNAME through the domain registration website. Our domain is registered with GoDaddy, so we will go that site and add a DNS record there.
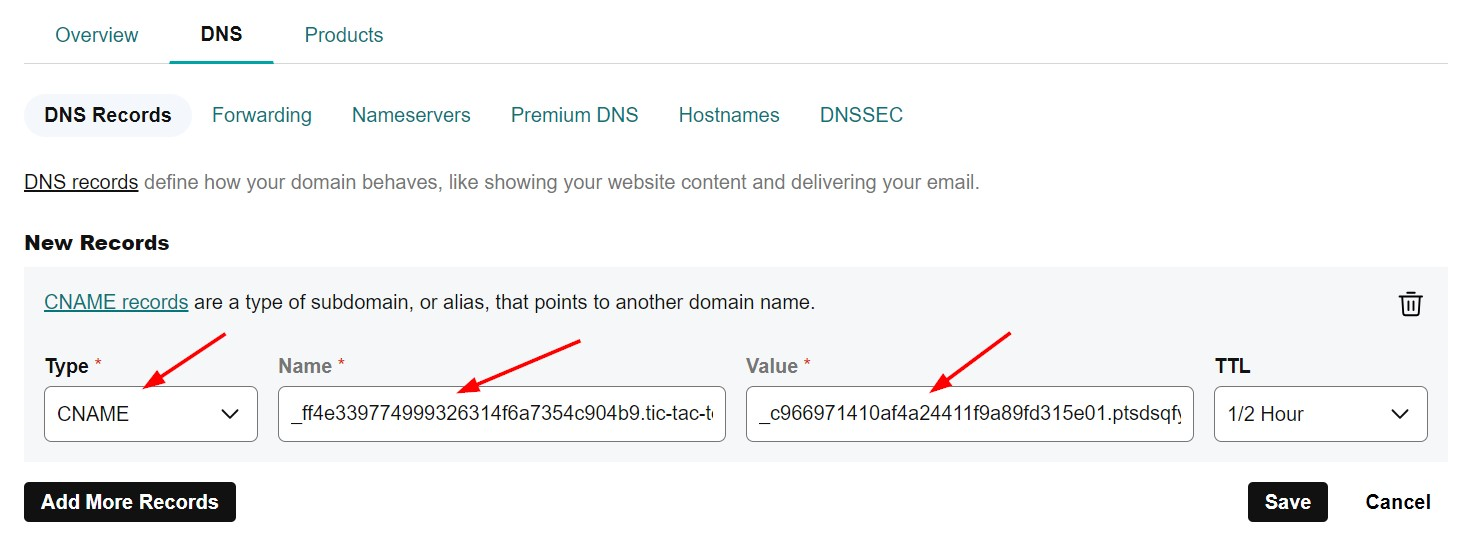
Make sure that the type is CNAME and copy the Name and Value from the AWS Certificate Manager screen. Save your changes. This will allow AWS Certificate Manager to confirm that we own this domain.
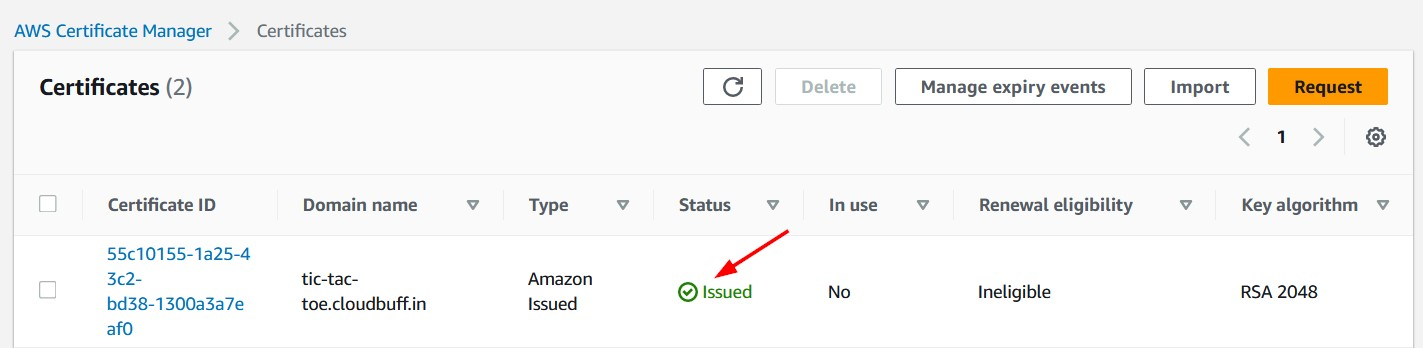
Note: DNS validation can sometimes take hours depending how DNS changes are propagated and become visible to AWS Certificate Manager.
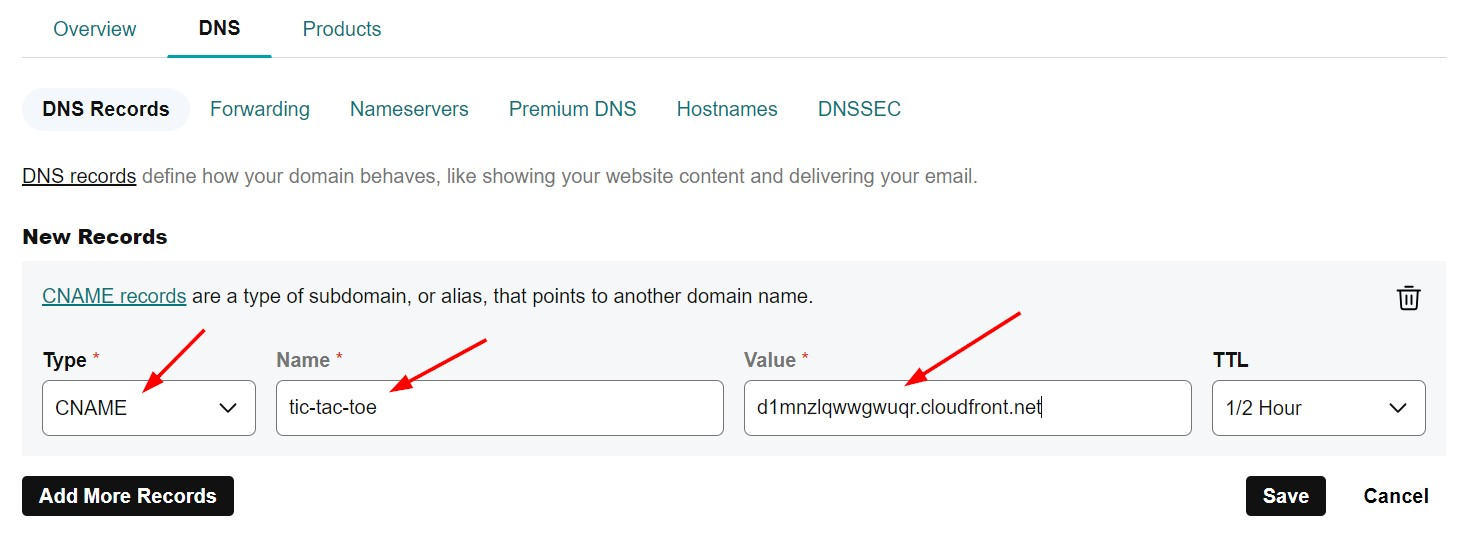
Update DNS
Once the validation is complete, we can add a new CNAME record to our DNS. This is to point subdomain tic-tac-toe to our CloudFront distribution domain.
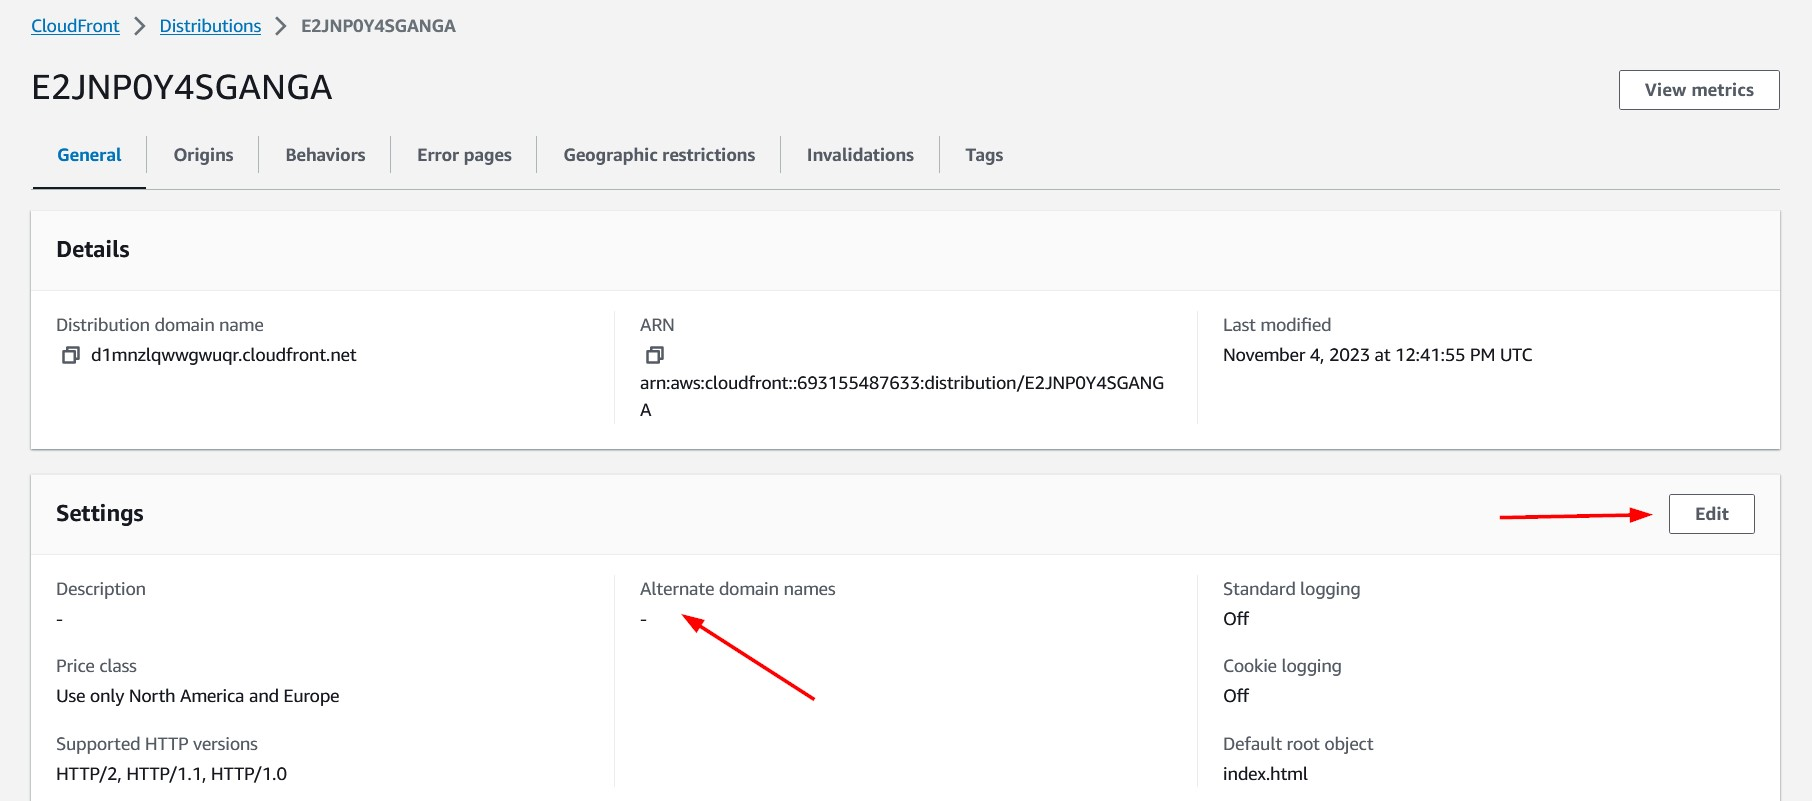
Update domain for distribution
Now, we will associate this domain with our CloudFront distribution. For this, we need to edit the distribution settings.
We need to specify our custom domain in the Alternate domain name (CNAME) field. We also need to select the certificate we created earlier in the Custom SSL certificate dropdown.
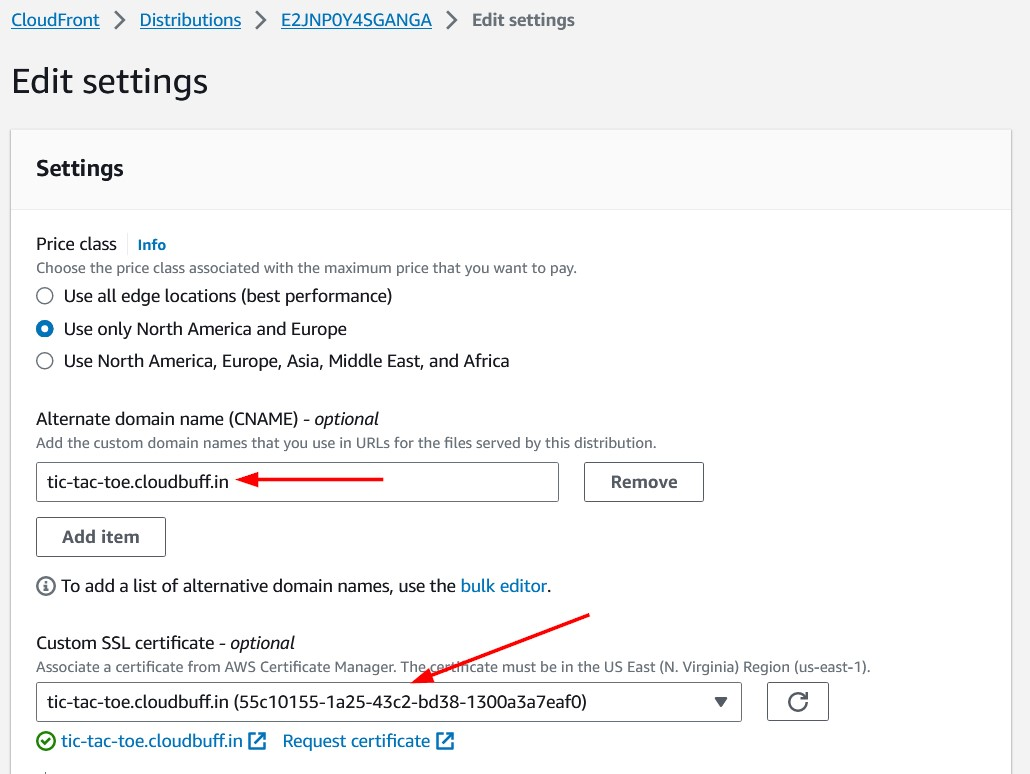
Click the Save changes button at the bottom to save. Now we should see our changes being deployed. This can take some time.

Once the changes are successfully deployed, we should see the date and time in the Last modified column.

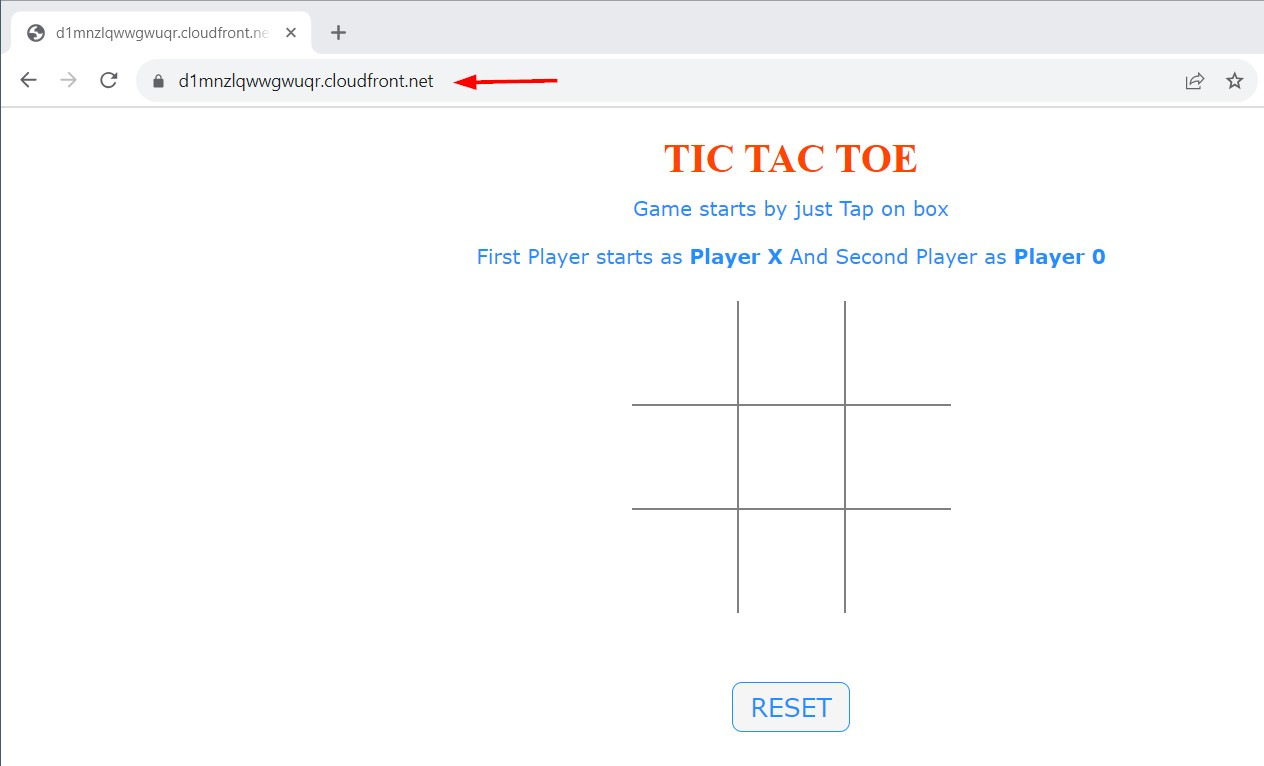
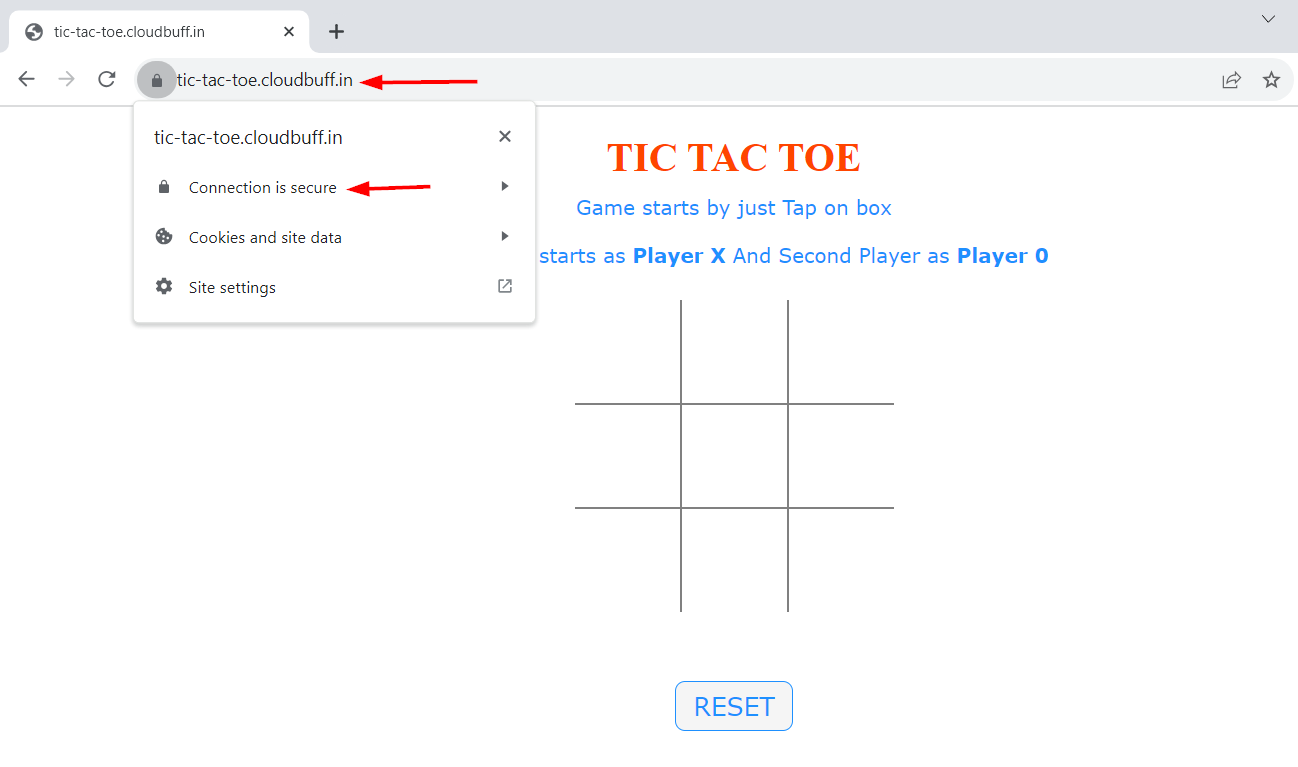
Now we should be able to access our website using our custom domain https://tic-tac-toe.cloudbuff.in/. Note that the website is secure and uses SSL/TLS.
Conclusion
In this article, we saw how we can use CloudFront as the CDN for our website. We also associated our custom domain with our static website hosted using S3. In subsequent articles, we will build further on this and see how we can deploy a dynamic web application in AWS without setting up any servers.