Hosting a Serverless Web Application in AWS - Part I
Set up a static website with AWS S3
I am a seasoned IT professional with deep experience in delivering business solutions in a variety of industries. Over the years I have successfully handled all aspects of project lifecycle - planning, product selection, analysis, architecture, design, development, implementation and support.
This is the first article in this series about hosting a serverless web application in AWS. We will start with hosting a static website and then move towards deploying a dynamic web application.
In this article, we will set up a static website using Amazon Simple Storage Service (S3). With this approach, we can easily set up a scalable website without requiring any servers.
Before we jump in, let's clarify what we mean by a static website. A static website consists of fixed content: HTML, CSS, and JavaScript files. A dynamic website, on the other hand, depends on backend or server-side processing.
We will set up a simple Tic-Tac-Toe game using HTML, CSS and JavaScript using AWS. We will use the source code available at https://www.geeksforgeeks.org/simple-tic-tac-toe-game-using-javascript/. You can download the files from here.
Why use S3
Amazon Simple Storage Service (S3) is a scalable object storage solution provided by AWS. It is highly durable, so you don't need to worry about losing your code or files. It offers high availability, so it greatly reduces the chances of our website being inaccessible. It is highly scalable - it can handle massive traffic spikes, making it an ideal choice for websites that demand high availability. We do not need to set up or manage any servers, so it eliminates the overhead of managing servers.
Create an S3 bucket
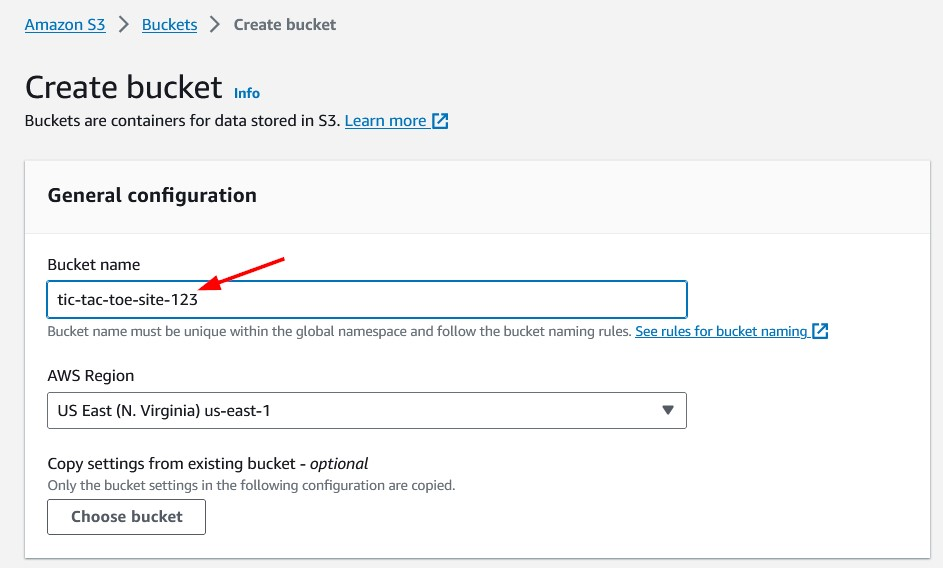
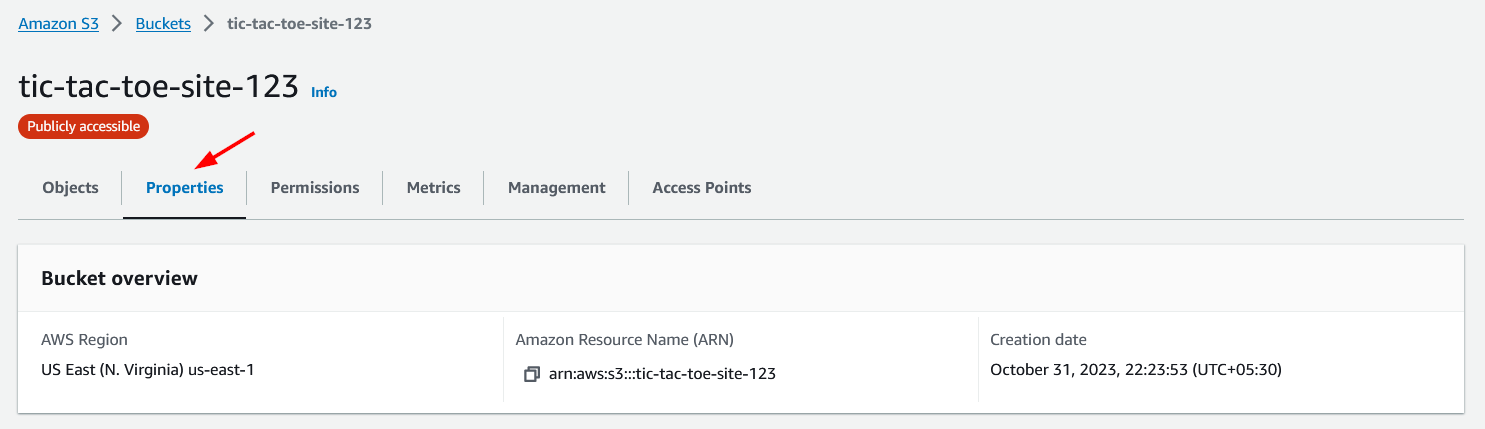
First, let's create a new bucket that we want to use to store the files for our website. We will create a new S3 bucket with the name tic-tac-toe-site-123. Note that the bucket names should be globally unique, so your bucket name should be different. For instance, replace the 123 with some other number to make it unique. I am using the region US East (N. Virginia) for this bucket.
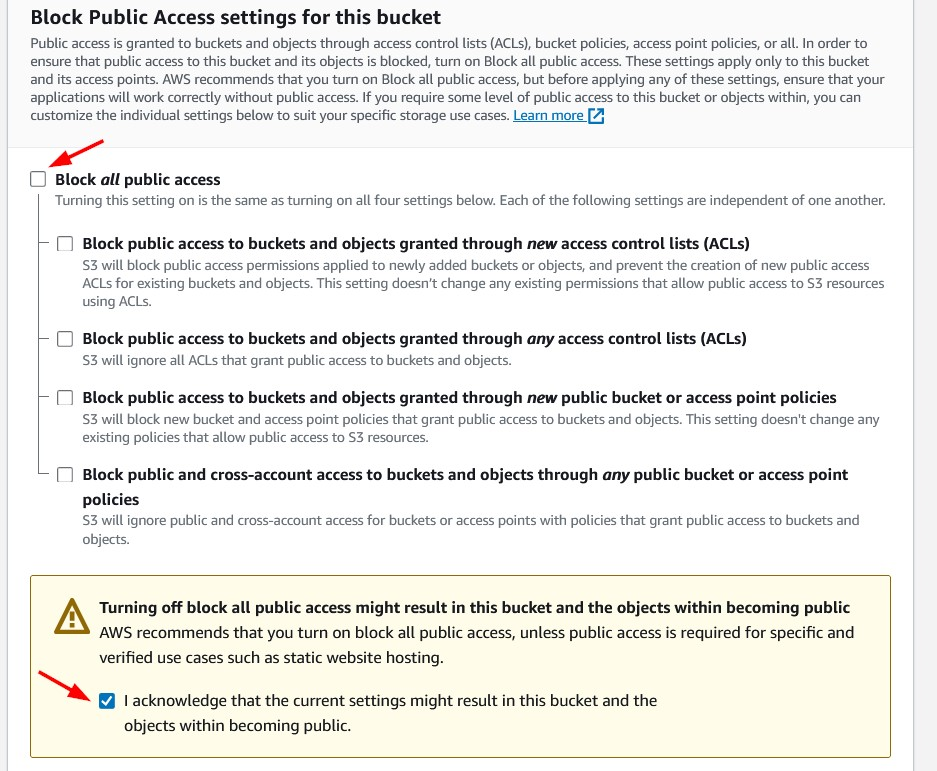
Our website will be publicly accessible. Hence our bucket will need public access. Uncheck the Block all public access box. This will uncheck all boxes underneath. Check the box in the warning section acknowledging that the bucket and objects in it will be publicly accessible.
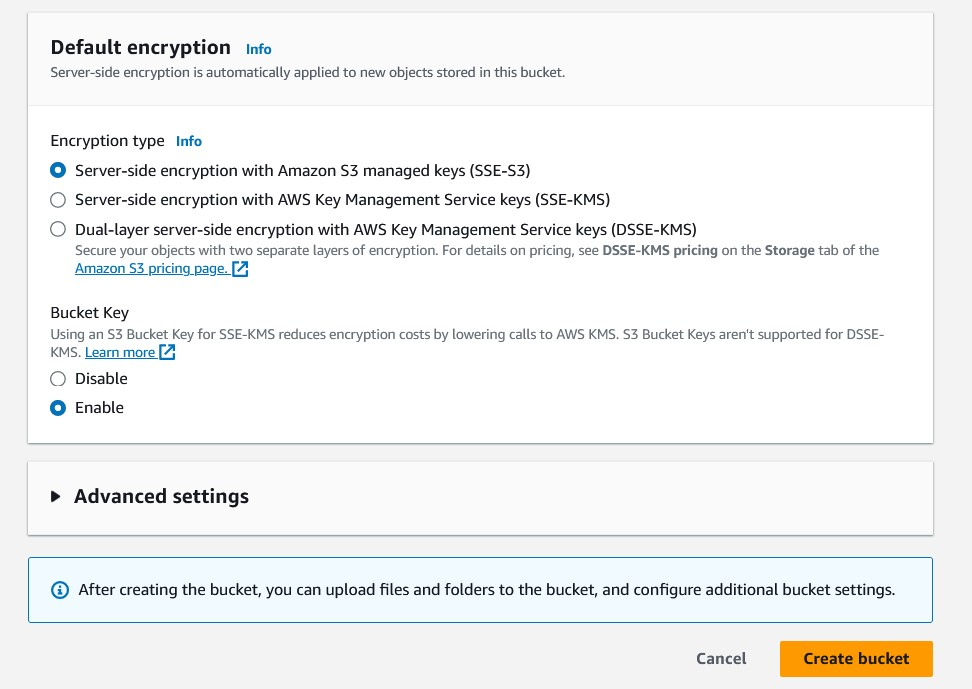
Leave default values for the remaining options and click Create bucket to create the bucket.
The bucket should now appear in the list of all buckets.

Upload website files
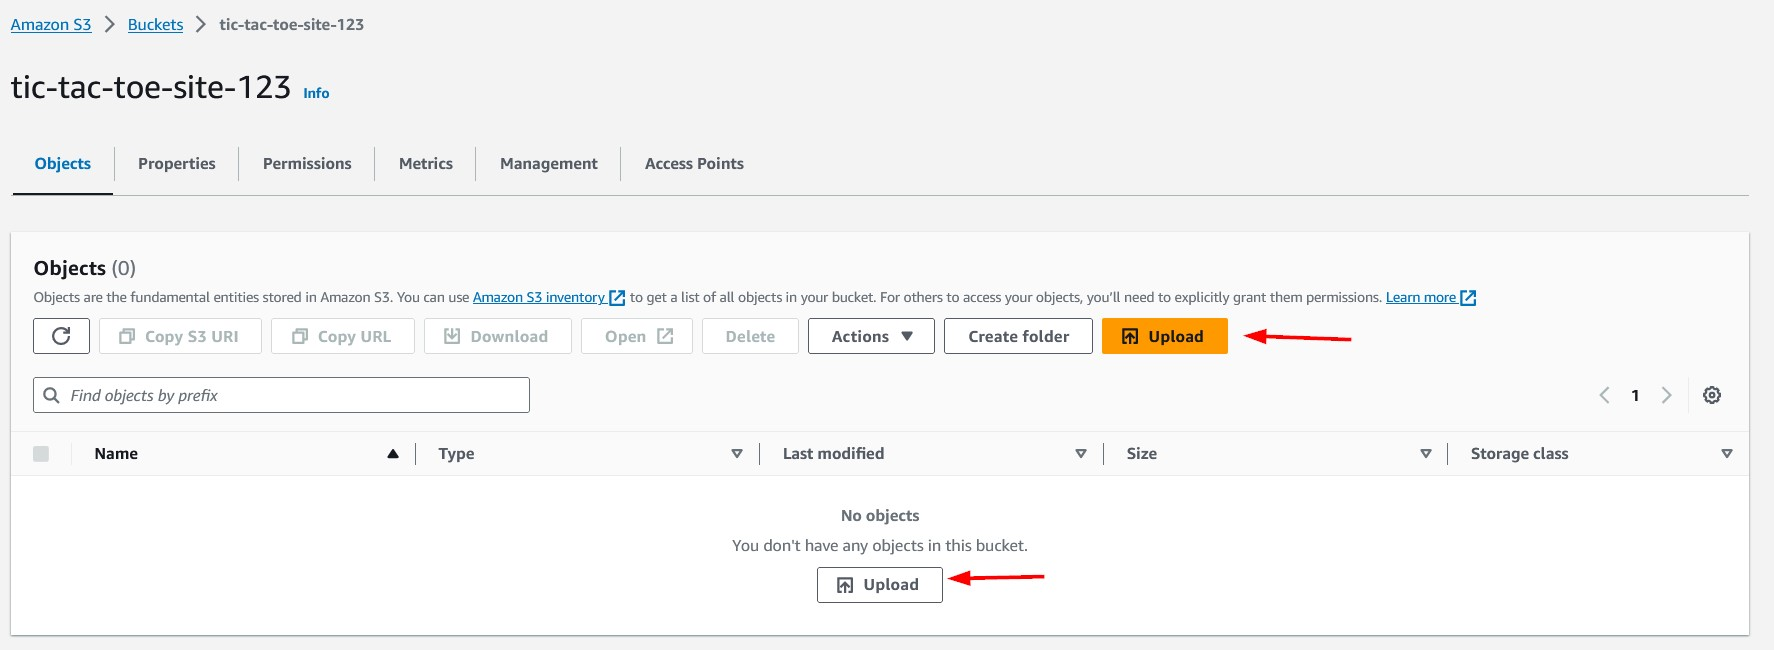
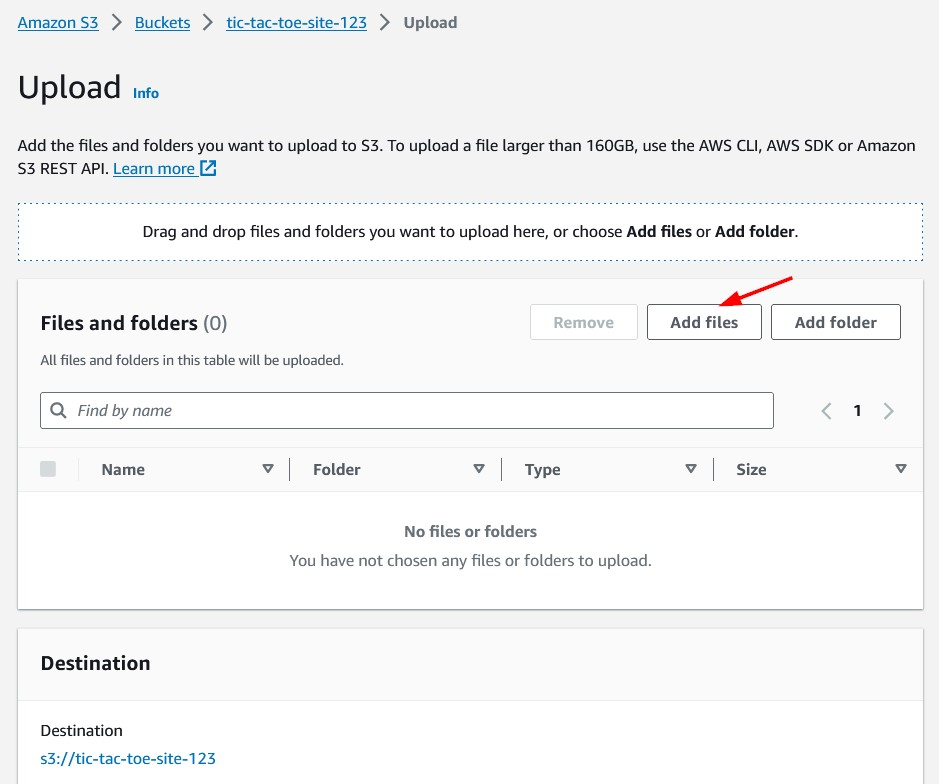
Click on the bucket name and go to Objects tab. Click the Upload button.
On the Upload page, click the Add files button to choose the files to be uploaded or simply drag and drop the website files.
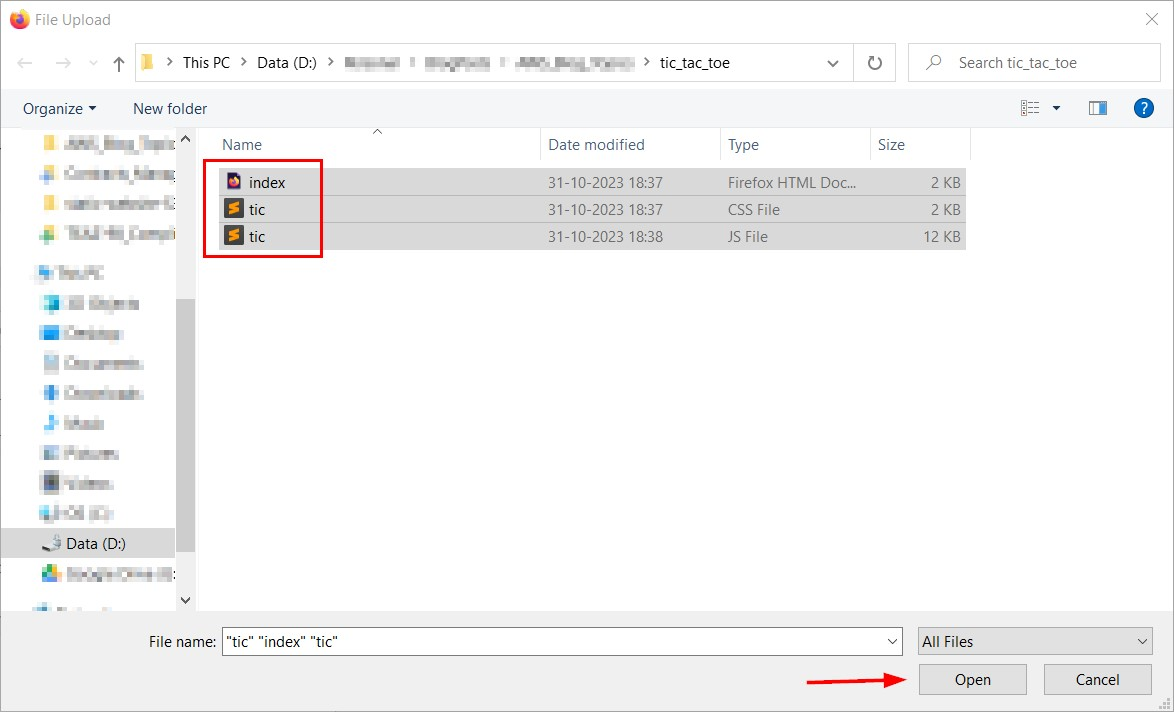
Go to the folder/directory containing the website files. Select all of them to upload.
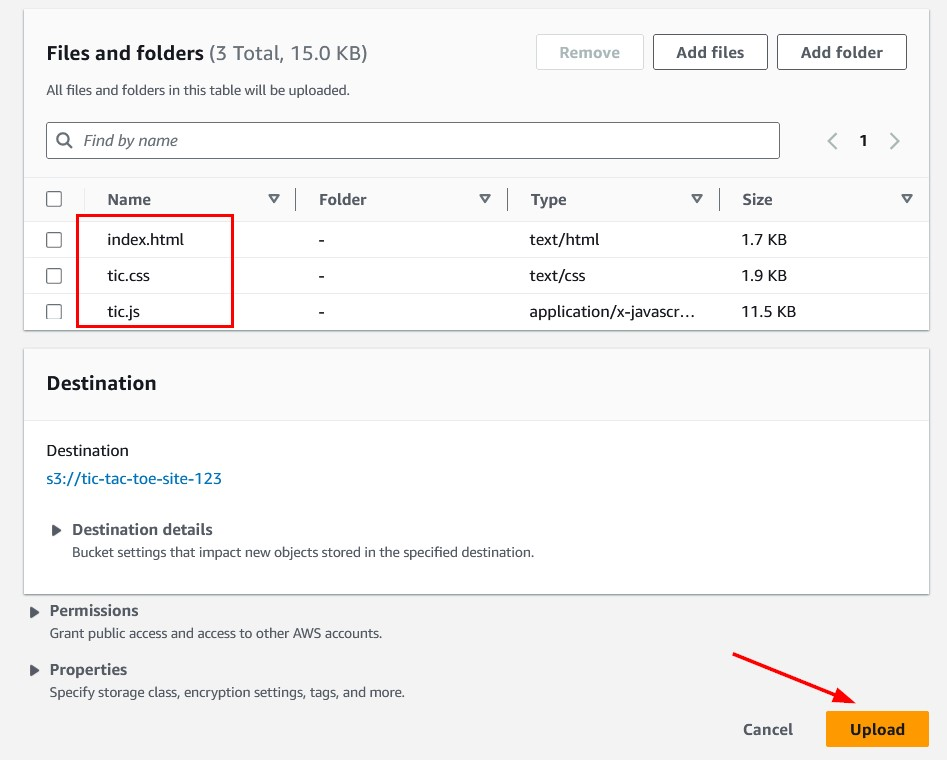
Once the files are listed, click the Upload button to upload the files.
Add permissions policy
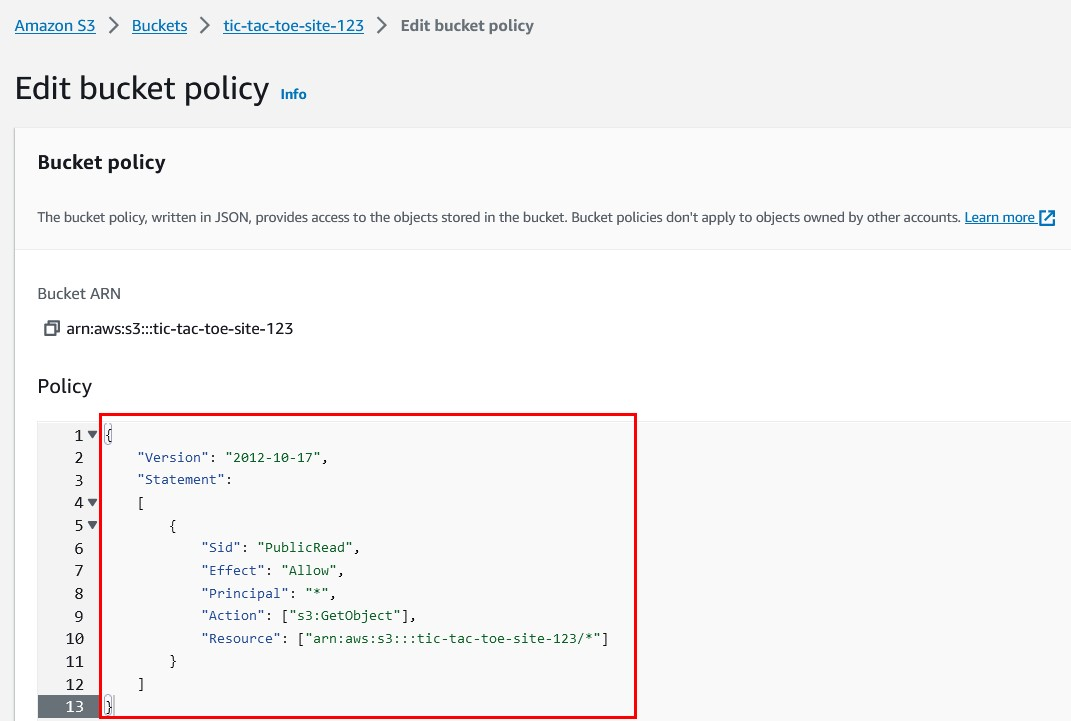
The uploaded files need to be made publicly accessible. Navigate to the “Permissions” tab and click the Edit button in Bucket Policy section.

Copy and Paste the following policy to make the bucket content publicly readable. Note that you will need to replace tic-tac-toe-site-123 with the name of your bucket.
{
    "Version": "2012-10-17",
    "Statement":
    [
        {
            "Sid": "PublicRead",
            "Effect": "Allow",
            "Principal": "*",
            "Action": ["s3:GetObject"],
            "Resource": ["arn:aws:s3:::tic-tac-toe-site-123/*"]
        }
    ]
}
Enable static website hosting
We need to let AWS know that this bucket is going to be used to host a static website. Navigate to the Properties tab, scroll down to the Static website hosting section and click the Edit button.
On the Edit static website hosting page, select the Enable radio button under Static website hosting and Hosting a static website radio button under Hosting type. In the Index document text field, put index.html as this is the home page on our website.
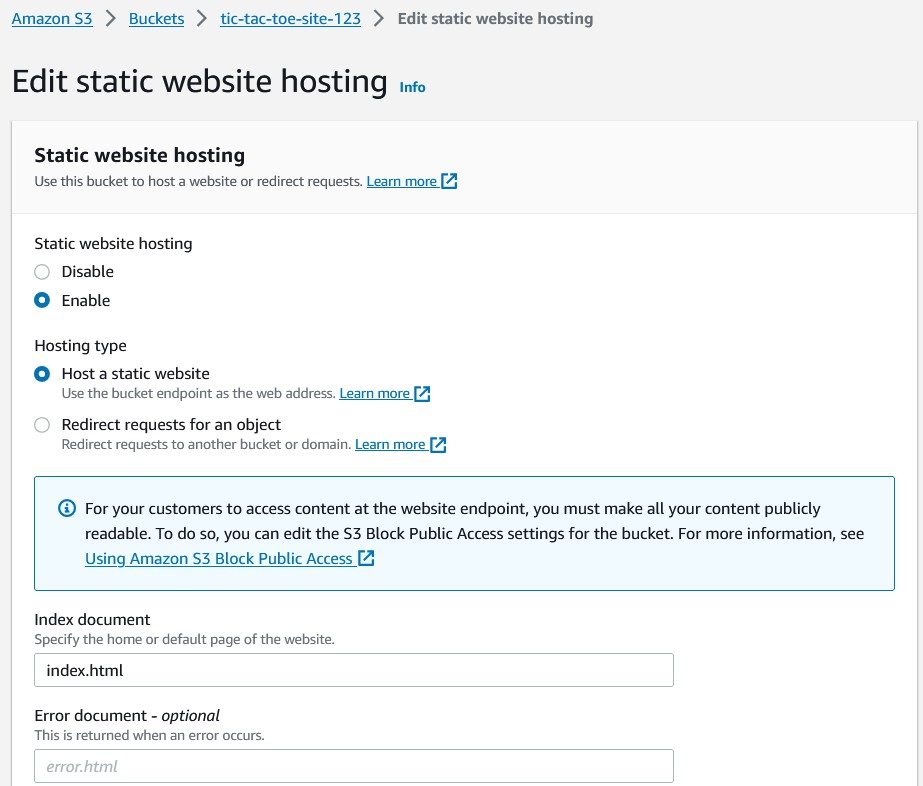
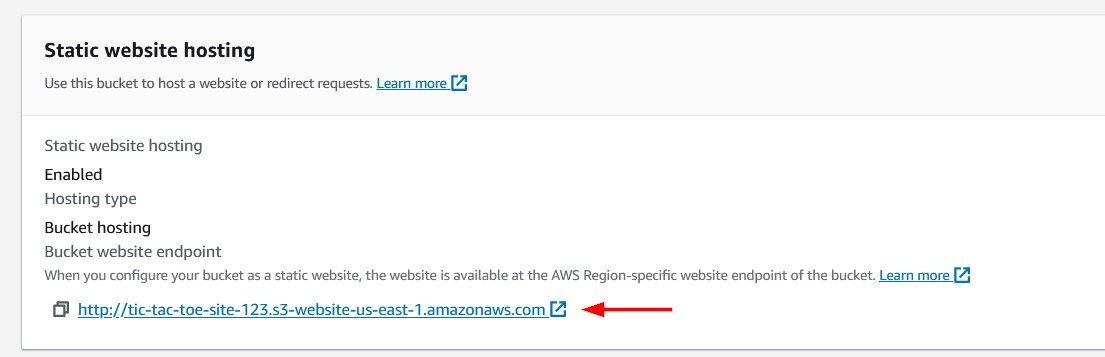
Click Save changes to save these changes. The link to access will now appear at the bottom of Static website hosting section.
Accessing our website
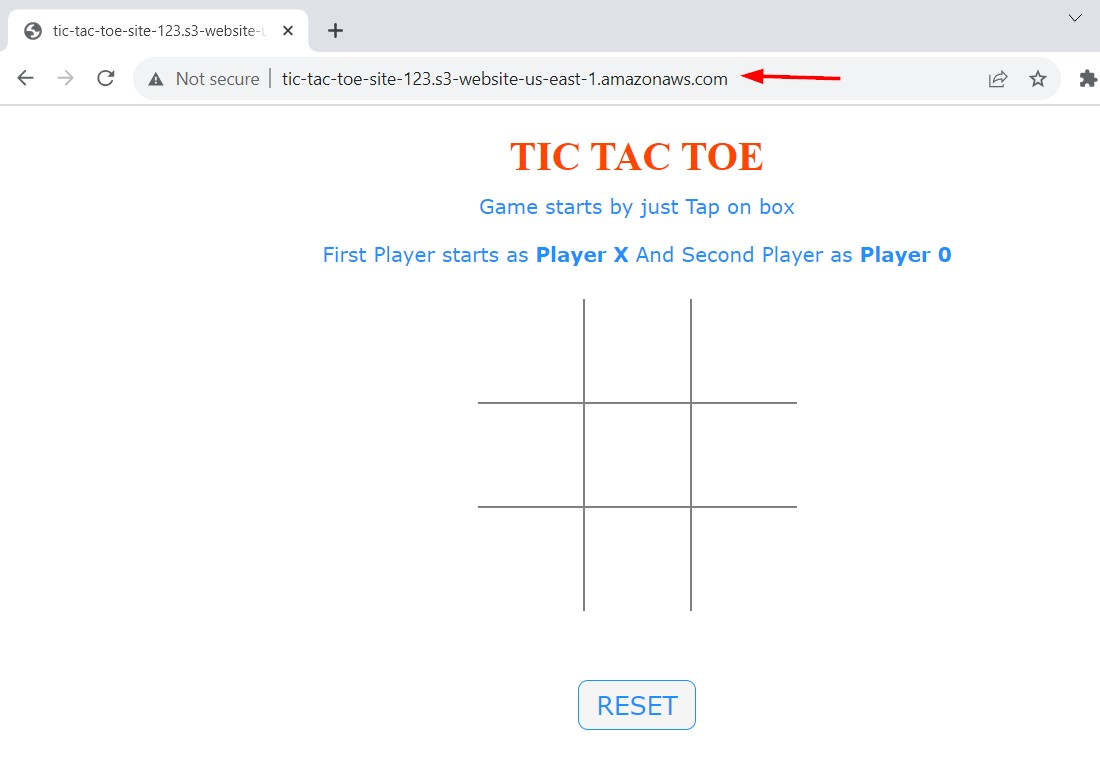
Click the link in Bucket website endpoint to open our website. We are now ready to play Tic Tac Toe game!!
Conclusion
It's great that our website is up and running but there are some problems with this. First, the website is not secure - it does not use HTTPS. Also, we had to make our bucket publicly accessible, which is not a good practice. In the next article in this series, we will see how we can avoid these problems by using CloudFront.