

Deploying Storage Queue Trigger Function
Up and running with Azure Functions - Part 5


In the previous article, we created a function that gets triggered when a message arrives in a Azure Storage Queue. Using a storage emulator, we tested our function locally. Let's deploy it to Azure and test it in the cloud now.
Create Storage Queue
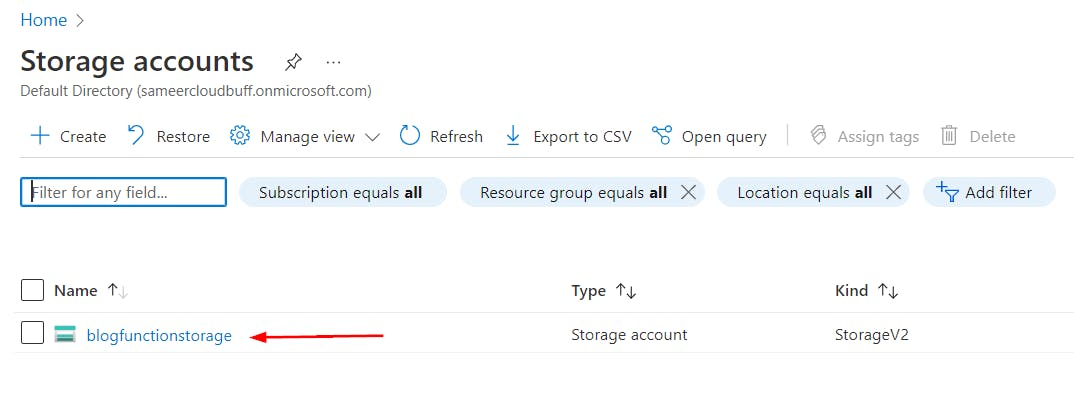
When we set up Azure Function App, we created a Storage Account and linked it to our Function App. We will use the same account to create a Storage Queue. In Azure Portal, let's go to our storage account.
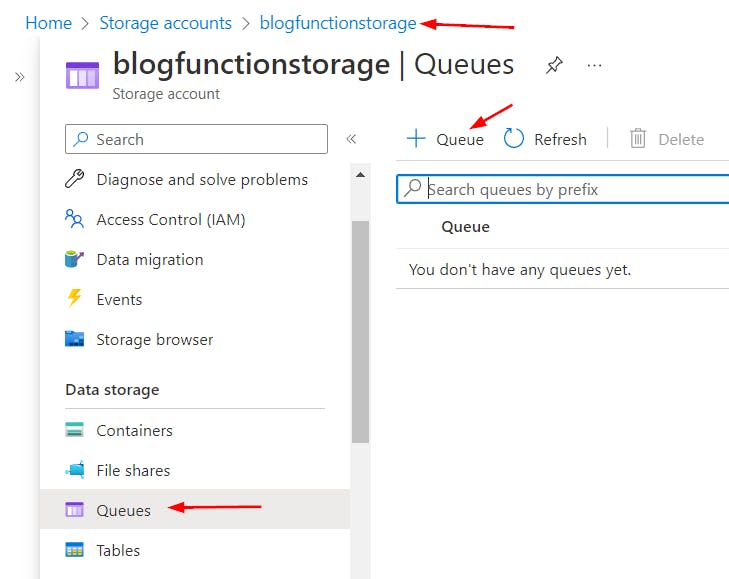
Click on the Storage Account name and then on Queues item in the left menu. List of queues is displayed on the right. There are no queues since we haven't created any yet. Click on + Queue icon to create a new queue.
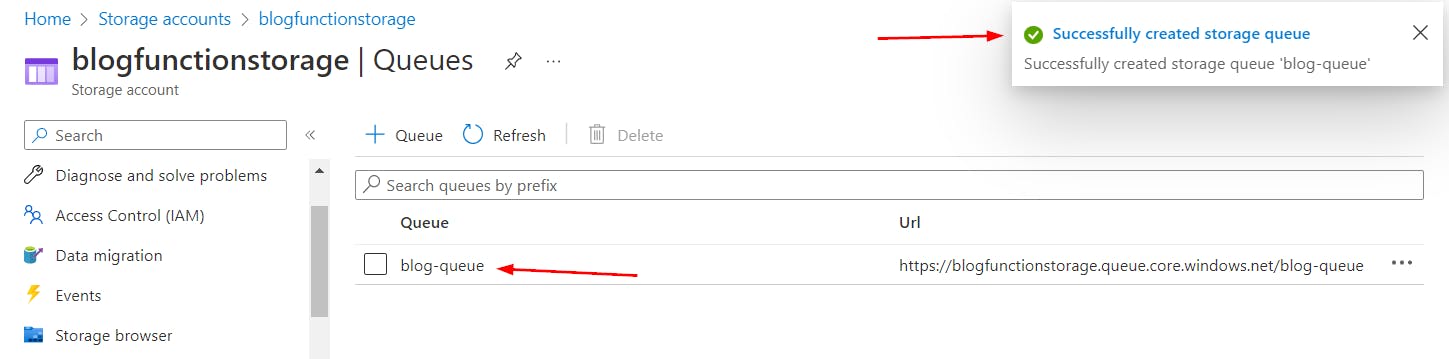
Let's create a queue with name blog-queue. This is the name that we specified when we created SimpleQueueFunction.

We should see a message indicating that the queue was created successfully. Next, let's deploy our function to Azure.
Deploy function
Let's go to Visual Studio Code and open the project that we worked with in our last article.
If you haven't signed in to Azure from VS Code, checkout this previous article to see the steps for signing in.
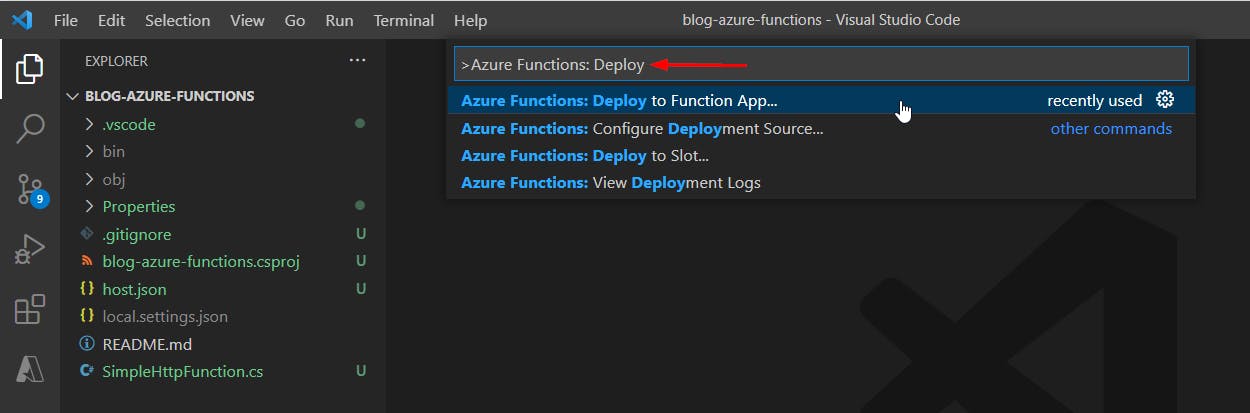
Open the Command Palette using keyboard shortcut Ctrl + Shift + P (use Cmd + Shift + P on Mac) or View > Command Palette... menu option. Type Azure Functions: Deploy into text box and select Azure Functions: Deploy to Function App... option.
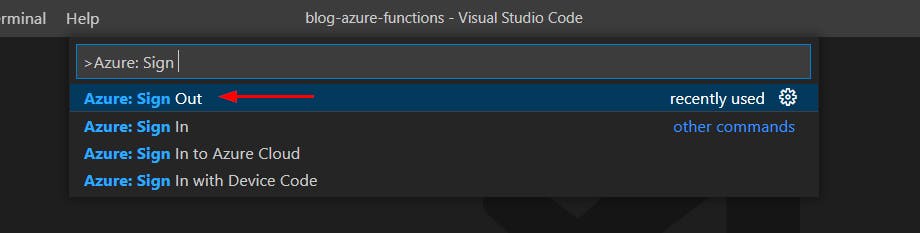
You may get a pop-up message in VS Code asking you to set up your Azure account. If you had signed into Azure previously and get this message, open the command palette, type
Azure: Signand click the Sign Out task. It will then allow you to sign in again.
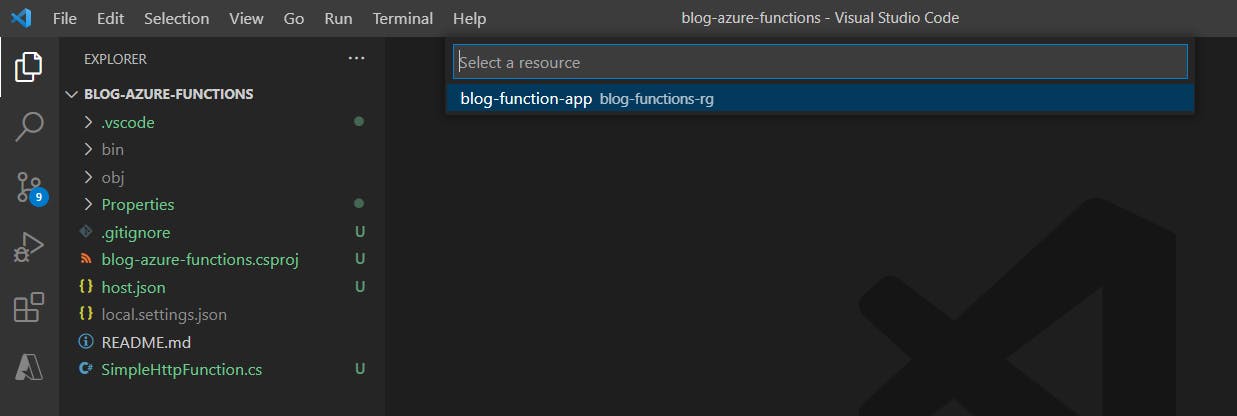
A list of Function Apps defined in Azure will be displayed. As we have created only one Function App blog-function-app, we should see just that in the list.
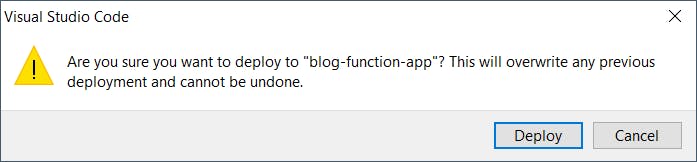
When we select blog-function-app for deployment, there will be a warning saying the previous deployment will be overwritten. We will click Deploy to proceed.
A Terminal window should open in VS Code and we should soon see Deployment to "blog-function-app" completed. message pop-up.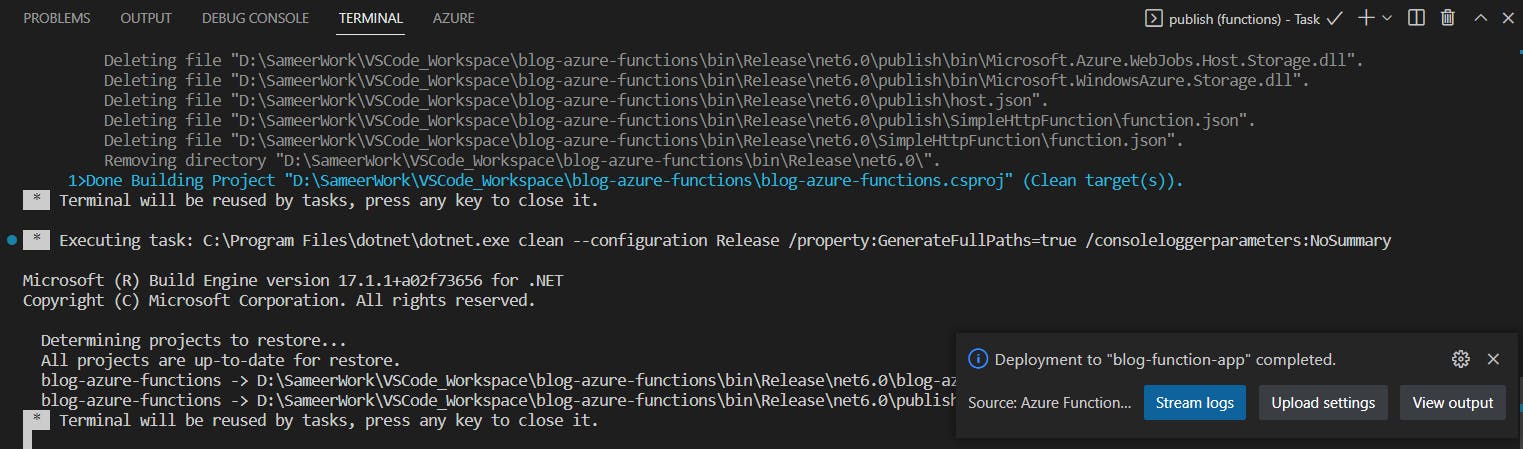
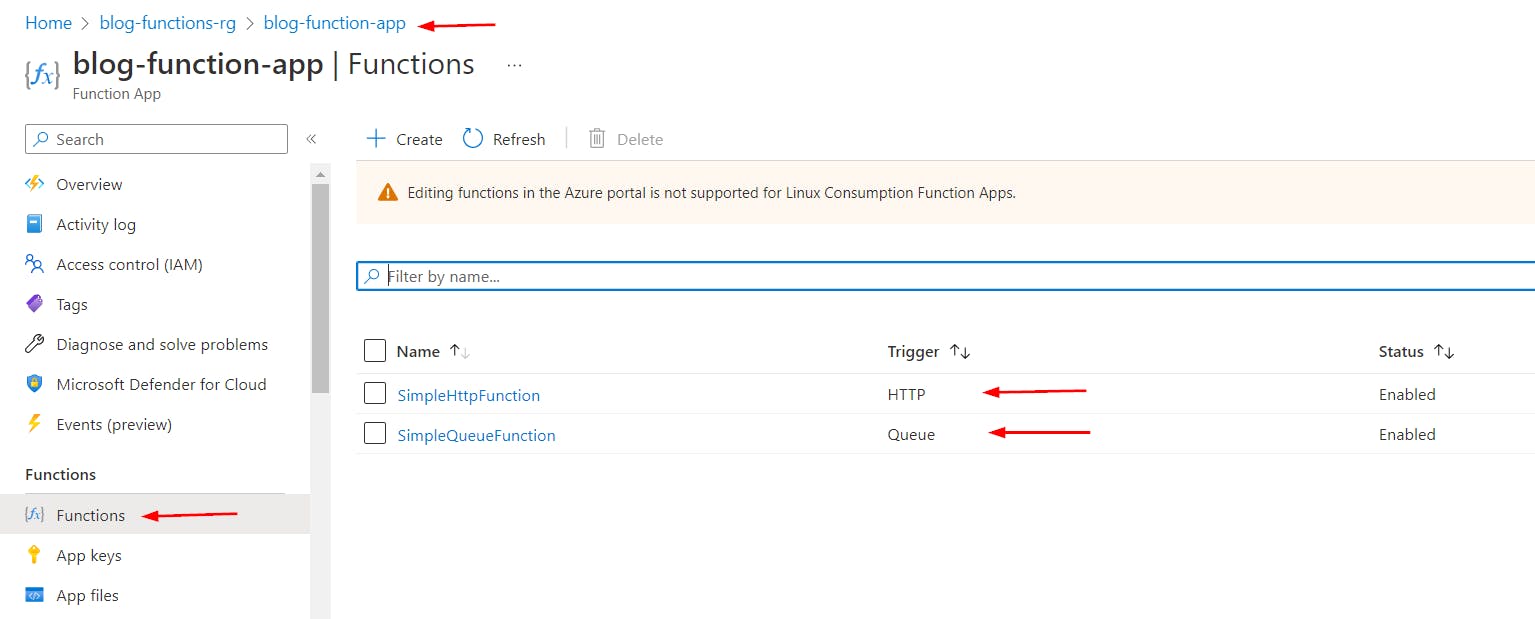
Our code has been deployed successfully. If we go back to Function App in Azure Portal and click on Functions menu item, we should see both SimpleHttpFunction and SimpleQueueFunction in the list.
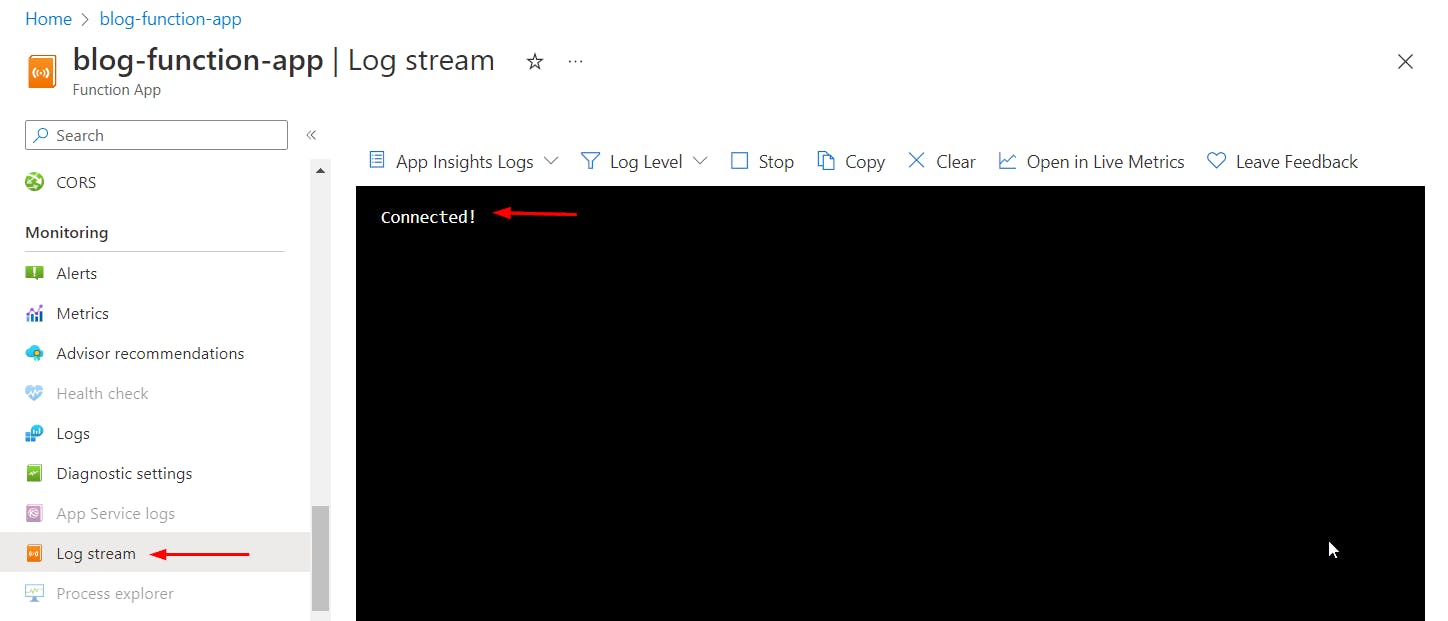
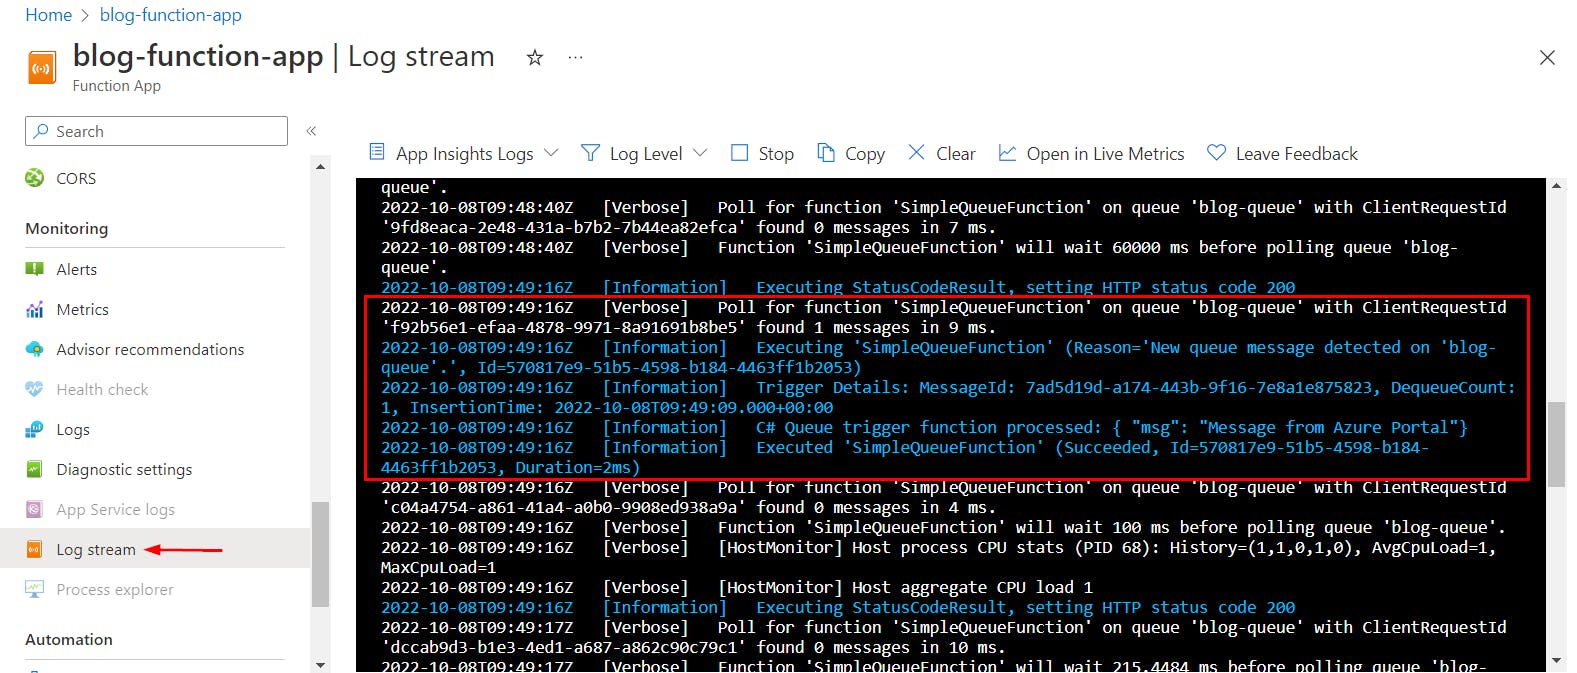
Let's test our function by putting a message into the Storage Queue. First, let's enable the log stream so we can verify that our function is indeed getting triggered when a message is received in the queue. We will go to our Function App in Azure and click on Log stream item in the left menu. A terminal will open to the right and in a few moments we should see that it is connected to our Function App.
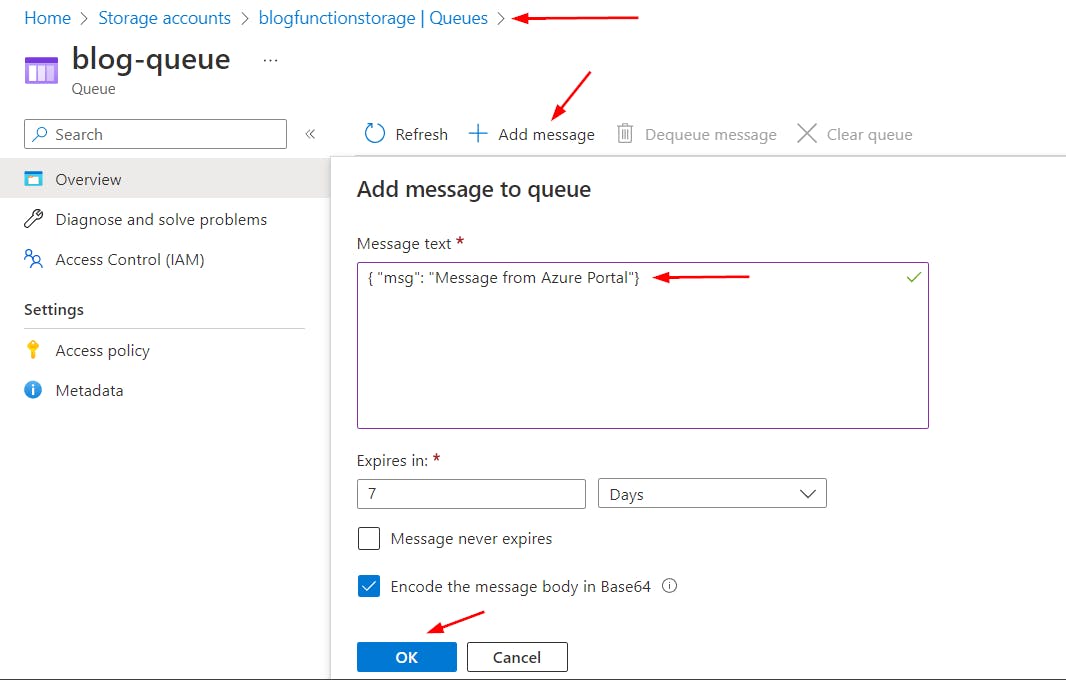
Let's keep this browser tab open so we can come back to check log messages. We will duplicate this browser tab (hover over the current tab, do a right-click and click Duplicate option from the pop-up menu) and go to the Storage Queue that we created earlier. Clicking on + Add message icon will open a pop-up window. Note that this window is similar to the window that we saw in Azure Storage Explorer tool. Let's use a simple JSON message { "msg": "Message from Azure Portal" }. Add the message text and click OK to add it to the queue.
Now let's go back to the browser tab for log stream. We should see that the SimpleQueueFunction function was executed and the message from the queue is displayed in the logs.
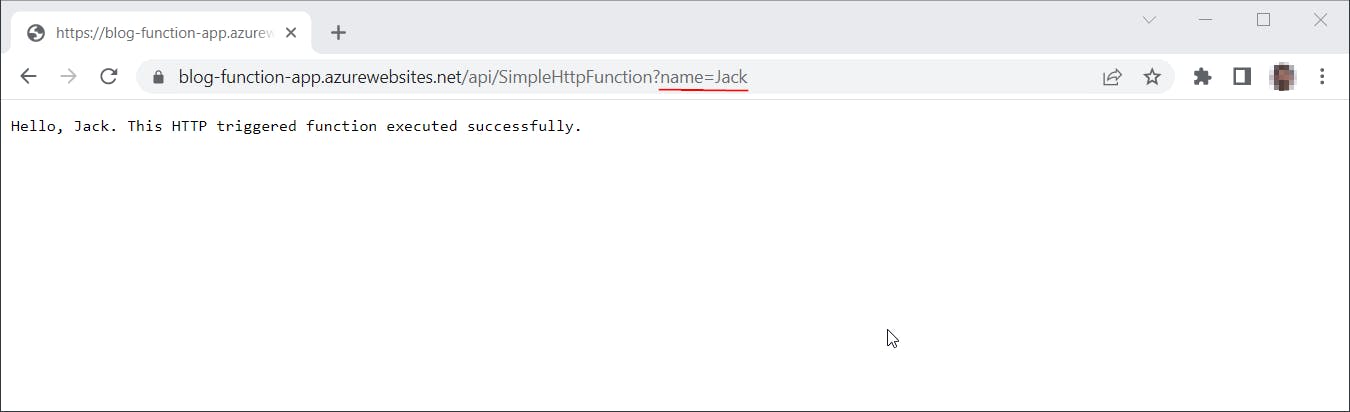
Now let's verify that the logging also works the same way for SimpleHttpFunction.
Open a new browser or tab, put URL https://blog-function-app.azurewebsites.net/api/SimpleHttpFunction?name=Jack into the address bar and press enter. If a message like the one below is displayed, it means our function was executed successfully.
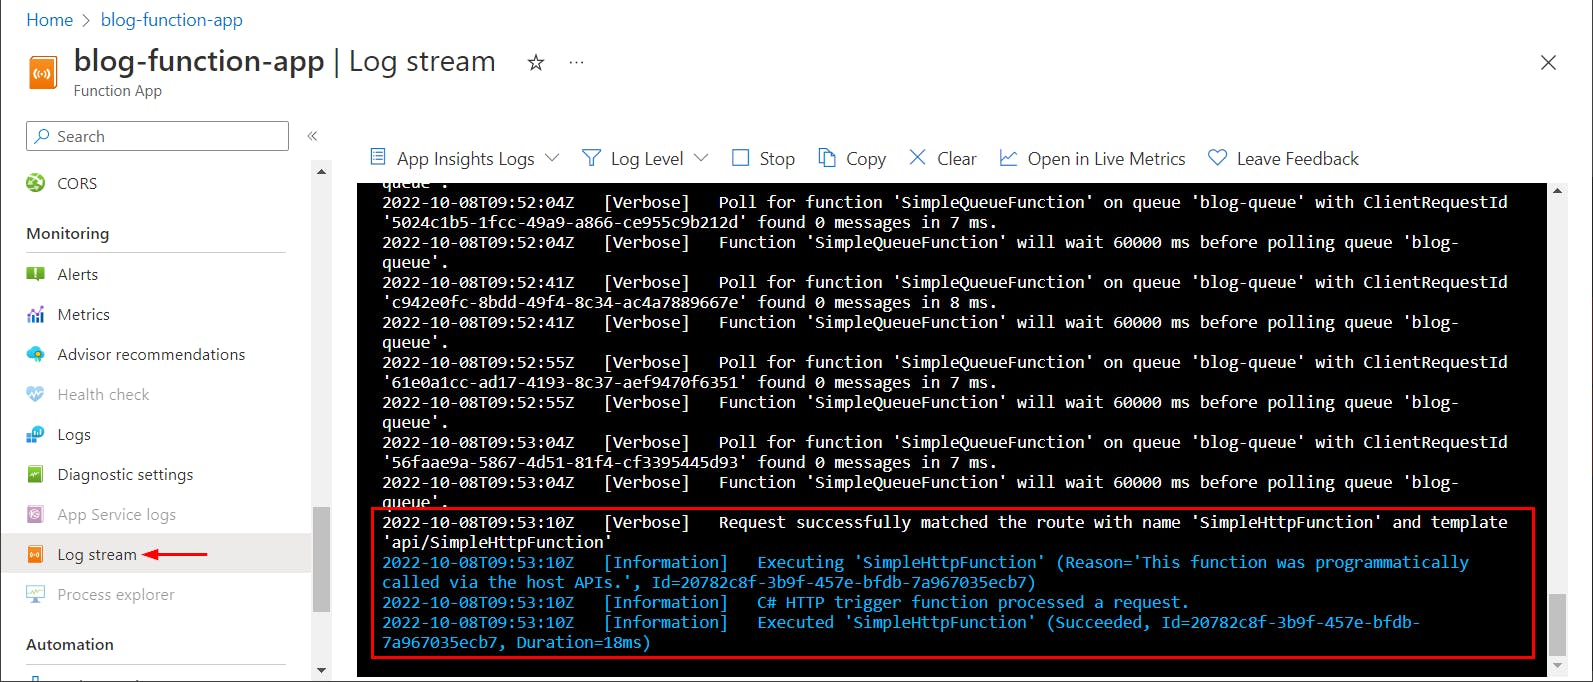
In the browser tab for log stream, we should see that the SimpleHttpFunction function was executed successfully and the log message was written to the log stream.
Stopping and starting Function App
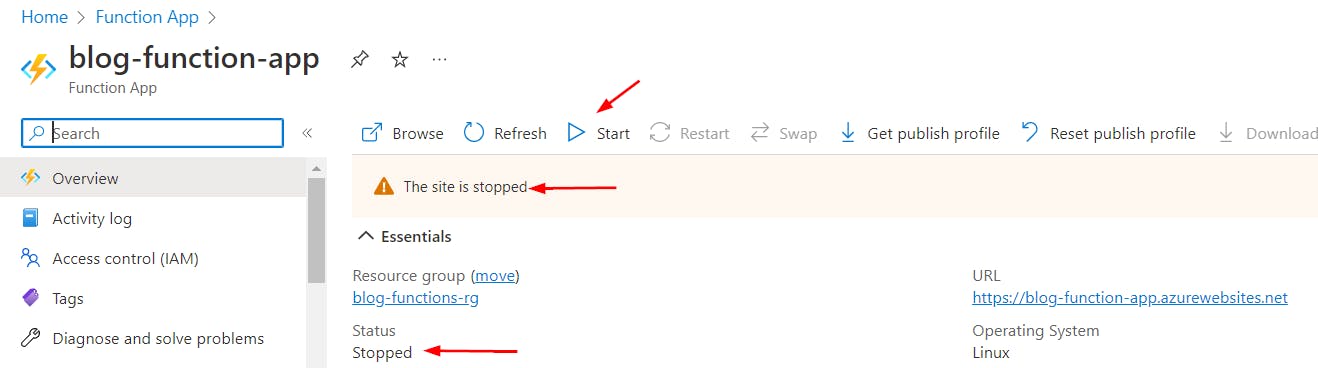
If we are still in test mode, we should consider stopping our Function App when it is not being used. We can go to our Function App and stop it.
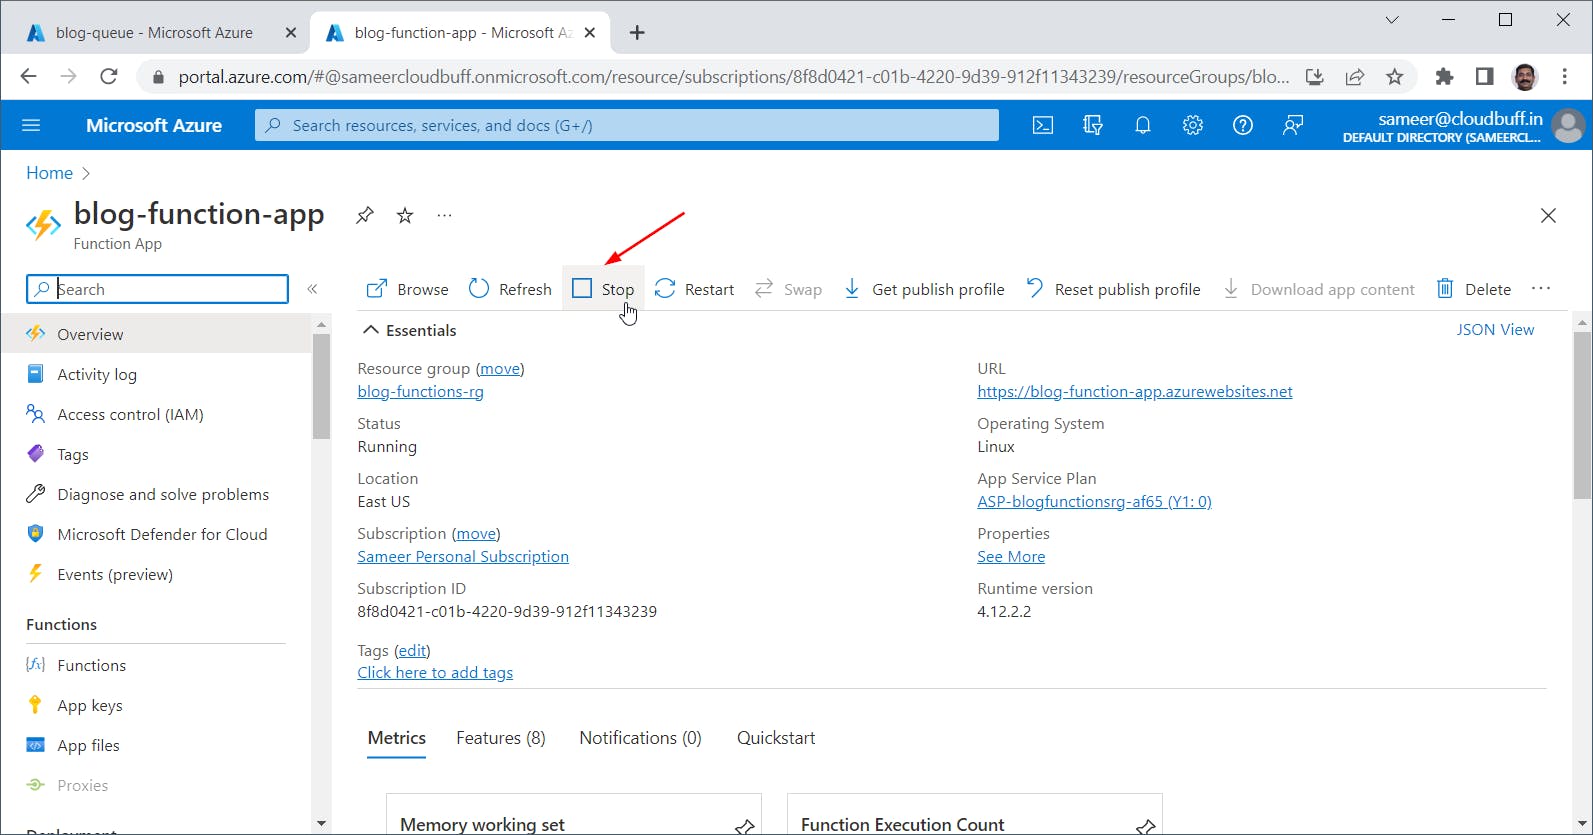
When we are ready to use it again, we can start our Function App back up.
Conclusion
In this article we deployed our simple function with Storage Queue trigger to Azure cloud.
We saw how to view the log stream of our Function App. While looking at logs this way is fine for testing, it is not a practical solution once the function is deployed and running. We simply cannot watch log stream all the time. Besides, it also means that we have to leave the browser tab open for the log stream to continue. In the next article, we will take a look at a much better solution for this. We will configure our Function App to send logs to a centralized location using Azure Log Analytics.